Appliance repair technicians do not know the exact details of every appliance they work on. They know the fundamentals and refer to the manufacturers manuals. While appliance repairs can be expensive, some can be done by those who understand the basics of working with plumbing and electricity. If you have rewired a lamp or replaced a faucet, it is likely you can repair some problems with major appliances.
Below are a three simple repairs that almost anyone can handle without needing to call a repair technician. However, if there is any doubt on how to proceed once a repair is started, stop and call a repair technician to prevent doing a job the wrong way. A little online research can also provide numerous step-by-step instructions to handle many other types of appliance repairs.
Timers
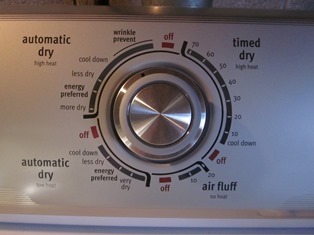 One of the main things to go on washers, dryers and dishwashers is a mechanical timer. A timer mechanism that has a rotating knob can have over a hundred internal parts. If one part goes bad, the timer ceases to function. These timers are self-contained and attach with a nut and some screws. Always disconnect the power and shut off the water supply to any appliance where repair is being made. To be safe, it can be helpful to unplug the appliance as well. The biggest thing in replacing a timer is getting the cover off of the appliance.
Look for screws and clips hidden under decals. Do not try to force a cover off. If it is not moving, a screw or clip is still in place. Be patient and look for it. Once the cover is off, unplug the wires from the old timer and attach them to the new timer. Knobs on timers are friction fitted. Gently pry them off. Unscrew the old timer, and attach the new one on place. Replace the knob and cover, and that is it.
Washer Hoses
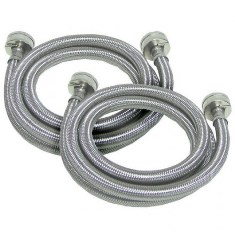 Washer hoses should be replaced if swelling at the fittings or bubbles begin to form. Shut off the water to the clothes washer, and remove the hoses using a pair of channel lock pliers. Take the hoses to a place that sells washers to get a new set. Look in the owner’s manual for the washer to see if Teflon tape should be used where the hoses attach to the washer. It is a good idea to add it to the threads on the supply valve end. Be careful not to over tighten hose fittings.
Oven Heating Elements
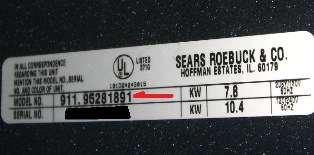 Though they appear to be difficult to replace, heating elements on kitchen ovens can be replaced in minutes. Get the model number off of the metal plate attached to the inside of the door of the oven. Order the appropriate top (boiler), bottom (baking), or stove top heating element. When it arrives, usually a screwdriver is all that is needed to replace it.
Be sure the power is off at the service panel. Look for a small screw just above or below where the heating element attaches to the back of the oven. Remove the screw and gently pull the element forward. There should be enough slack to get to the wires that are attached with friction fit fittings. Carefully pull off the old wires and prevent them from slipping back through the hole. Be careful to not cut the insulation or break the wires.
Put the new element in its proper orientation. An upper element may be attached with a screw and support. Bottom elements usually rest on the bottom. Firmly reattach the two wire fittings. One goes at each end of the element. Gently push the slack back through the holes and reattach the elements using the same clips and screws. That is all there is to it!
| I would like to thank Gina Howard from PartSelect (an online retailer for replacement appliance parts) for writing this guest post. Gina and her husband can be found working on their fixer upper when they are not at work. As avid DIYers they have also successfully completed each of these repairs so that their existing appliances will last longer and did this mainly “with the help of online tutorials.” |
