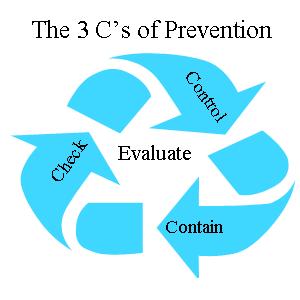
 In our last few articles we outlined what the principles of the 3 C’s of prevention, followed up with two articles on the first two principles are as they relate to homeowners who might be working on their home with lead in it. The first article dealt with control; controlling access, the dust created, the tools you used, and your environment. Last week’s article dealt with containment; how the EPA sees it, a few quick tips, exterior projects, and then all those pesky items like doors, windows, and vents.
Check or Clean
In last week’s article, we closed it out by saying “we will wrap up this series with our final C – namely cleaning.” The catch is if you look above – the final C stands for “check.” As you may recall from our first article, “To check something means to not only examine something to verify it’s condition, but just like in hockey; to block or impede an action. In the case of water, not all water damage comes from the outside, so if you spot a leak from a bathroom sink, or toilet it would be best to get it cleaned up, but also fixed. While smoke detectors will alert you to a fire, if you do not check to make sure they work & replace the batteries when needed, you may find yourself in checkmate.”
While Working:
While one is working, you generally will have trash that needs to be removed, kids to be checked on, or it may be time to take a quick break. The EPA simply states, “Use precautions to ensure that all personnel, tools, and other items, including the exteriors of containers of waste, are free of dust and debris before leaving the work area.” Depending on what you are doing, we would recommend simply using some wet wipes & quick vacuum down of your clothes to help get the dust off. If you are demolishing plaster or something similar dusty, wearing a full Tyvek suit and stripping out of it in a second enclosure area would be a better option.
Food & Drink in the area:
As a general rule, it is not a good idea. With that said, if you are simply prying some trim off, nothing is wrong with it if you keep it far enough away. I have some bottles I used for backpacking that are fully sealed which I use. This helps eliminate any possible contamination getting into it.
Removing Trash:
Large pieces of drywall & wood do not need to be wrapped, but they should be dust free, before leaving the area. You can simply wipe them off, vacuum them, or if you are paranoid feel free to wrap them up in plastic and tape them off. As for smaller debris, we simply have a large trashcan that we line with a construction grade trash bag (or two). We fill it up based on weight & tape it closed. One abatement trick is called the gooseneck where you tape it once, fold it over itself & tape it closed again.
Clean up steps:
For both the interior & exterior one needs to first remove all the big trash, followed up by the paint chips. As the EPA requires plastic to be used, it makes it hard to use a vacuum to help pick them up, so in many cases it is done by hand. A broom is generally not recommended as it kicks up the dust unless you mist the plastic first & do what is called wet sweeping. You should also clean and remove any tools & other items that maybe in your way.
Speaking of misting (per the EPA), “Mist the sheeting before folding it, fold the dirty side inward, and either tape shut to seal or seal in heavy-duty bags. Sheeting used to isolate contaminated rooms from non-contaminated rooms must remain in place until after the cleaning and removal of other sheeting. Dispose of the sheeting as waste.” Folks all you need is a light mist from a bug sprayer or hair spray bottle, not a soaking. Please make sure all electronic tools, and other sources have been removed from the area before doing this, as water & electricity do not mix to well.
QUICK TIP 1: wait one hour after work has been completed before taking down any plastic, as the dust will generally have already settled down by then.
QUICK TIP 2: while I cannot recall the contractors name that shared this on one of the forums – before setting up all your containment – place a piece of plastic on the floor approx 6’ x 6’ towards the center of the work area. As this is under the primary containment area, when one folds the primary barrier up, any water, dust, etc… that may try getting out is caught by the second piece and gives you a nice way of wrapping it all up.
Additional Interior Cleaning:
Per the EPA, everything in the work area & extending 2 feet out from it must be cleaned starting with the;
- Walls: Either using a vacuum with a HEPA vac or wipe with a damp cloth, starting at the ceiling and working down to the floors
- Thoroughly vacuum all remaining surfaces and objects in the work area, including furniture and fixtures, with a HEPA vacuum.
- Carpets: A HEPA vacuum with a beater bar must be used to vacuum carpets and rugs in the area’s (can anyone say feel good but worthless?)
- Mop any uncarpeted finished floors in the area (they specify a 2 bucket system) but like the carpets it is another feel good
but worthless measure
Final Checks:
While you don’t have to perform these steps, a Certified Lead Renovator must do the following checks;
-
Interiors
-
Perform a visual inspection to determine whether any dust, debris or residue is still present. (Repeat cleaning steps until none seen)
-
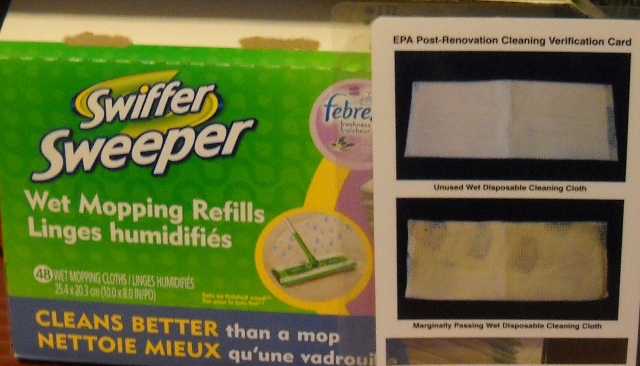
Verify that each windowsill in the work area has been adequately cleaned by wiping said sill with a wet disposable cleaning cloth & comparing to the cleaning verification card (Blah, blah, blah – basically if it still fails after 2 more
attempts, wait 1 more hour wipe it with a dry cleaning cloth and it now passes) -
Wipe uncarpeted floors and countertops within the work area with a wet disposable cleaning cloth. (Same steps as above window sill – max 40 SF per cloth)
-
-
Exteriors – visual inspection only required to determine whether all dust, debris or residue has been removed or cleaned from all surfaces in and below the work area.

