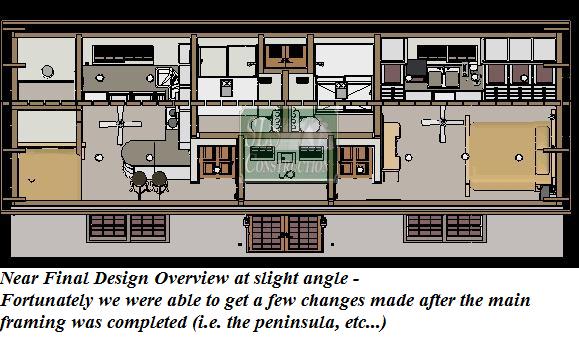
 In this series on Looking Back & Looking Forward, we are reviewing a green home we built over 2 years ago, the lessons learned and more importantly, how we can utilize those lessons on future builds. In the last two articles we covered in the drying in portion of the building. This process is necessary to allow the trades to work on installing their materials without them being damaged by the rain or the elements. In this article, we are going to cover the interior framing and the rough in process.
Interior Framing – Shelter in Place:
Most framing companies and framers simply frame up the interior walls after the exterior has been dried in. As you can tell from the picture above, that was not the case here. We actually framed up the interior walls before we finished the exterior ones & tied them into the exterior ones via the top plates. One of the main reasons for this is that we did not feel the occupants could safely make it to a proper shelter in the case of a tornado warning. Thus we built the structure to handle winds of up to 140 MPH plus, and designed the bathroom area as a shelter area with a combination of 2×6 walls, double top plates and solid core doors.
Interior Framing – Universal Design:
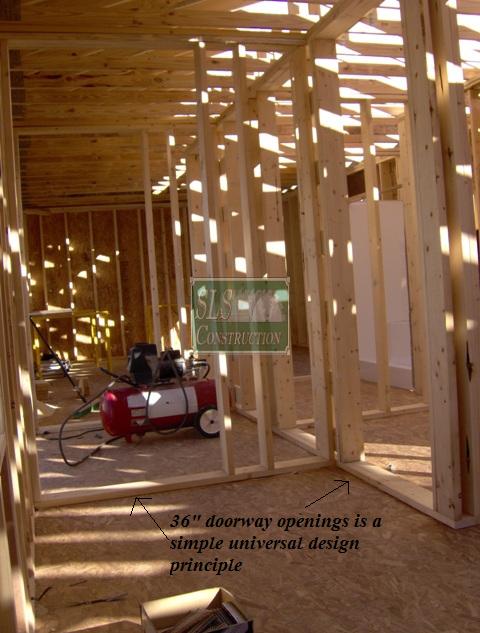 As we have mentioned in prior articles on Universal Design principles, there is not much to them. As you can see in some of the pictures below, we framed out all the interior openings to accommodate 36” doors, added blocking as appropriate and have a decent sized bathroom where one can utilize a walker. While it is also large enough for a wheelchair, the shower & vanity selected would be a cause of concern.
Interior Framing & Plumbing Rough-In’s:
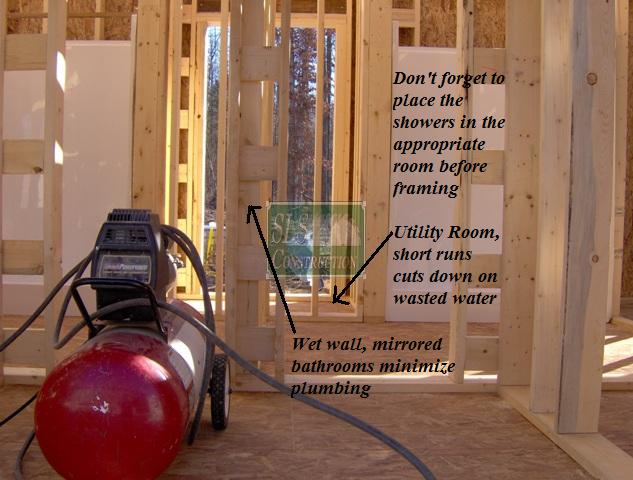 Even if we had not utilized 2×6 framing for some key interior walls (see above – Shelter in Place), we would have definitely gone that route for the wall separating the two bathrooms. The key reason for this, it is what is called a wet wall, where the main plumbing supply and waste lines are run. We are also able to mirror the two bathrooms, which helped us cut down on the amount of plumbing runs required & allowed us to use one pipe for venting. I do have two pieces of quick advice – do not forget to bring in any one-piece shower units before you start framing (no, I did not forget – I learned off someone else’s mistake many years ago) & do not forget to insulate behind it, if it is going against an outside wall.
Cable TV (CATV), Telephone & Internet:
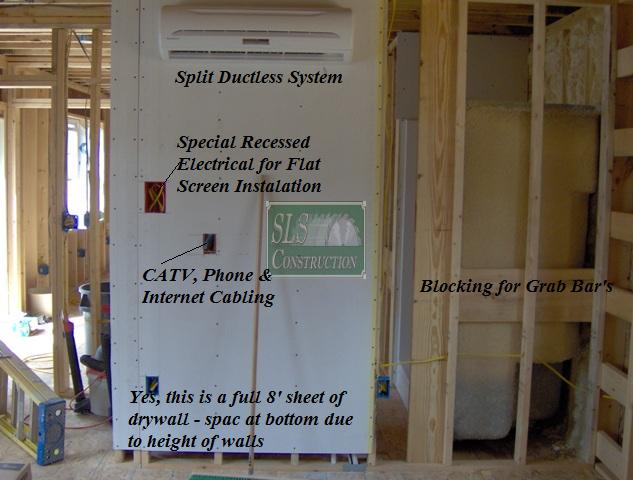 As some of you may recall from our Wires or Wireless article, we are not a huge proponent of relying on wireless devices. While some groups say that you do not have to run them in conduit, and can let them run free, I will have to disagree. There are two primary reasons for this – troubleshooting a line that gets damaged and upgrading the lines in the future. In this case, we utilized the best method known at the time for routing the wires from a central location to each unit. At that time, it was to run the wires through a blue conduit designed for low voltage wiring. In the future, we will be utilizing the eXapath product from Home Path Products that we wrote about it in this article: Remodeling Right: a Hedge against Changing Technology.
To see the installation process, what it looks like and another professional remodelers thoughts on it: Chris Wright of Indianapolis WrightWorks recently used it & posted about it on RemodelCrazy
Heating, Venting, and Air Conditioning (HVAC):
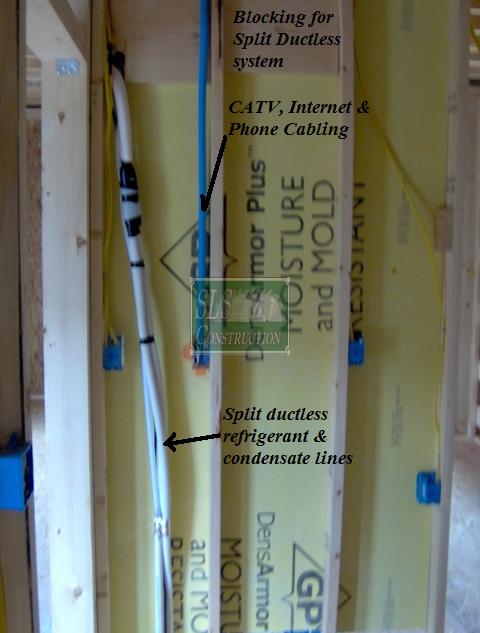 As a quick FYI, in a future article on Indoor Air Quality, we will cover the Venting topic. To handle the Air Conditioning and Heating needs we installed a Split-Ductless system. The nice thing about this unit is not only didn’t we need to run any ducts, but also all the space that was saved. Another nice feature is that each unit has their own thermostat.
Electrical Rough-In’s:
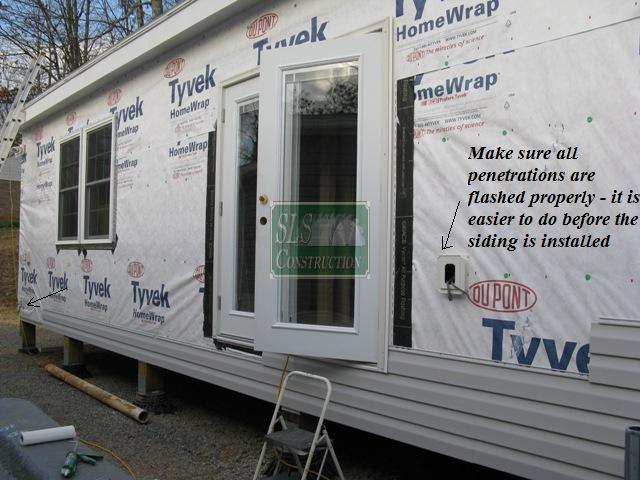
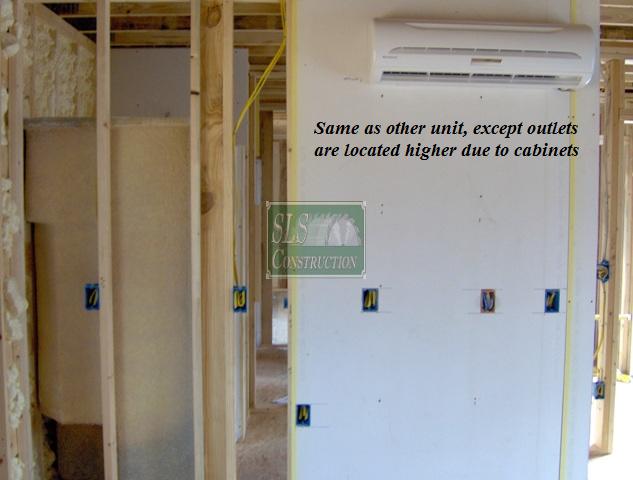 Truly, there was was not anything special about roughing in the wiring. We made sure each unit had a ceiling fan located in it. While everything located in this house was electric, we did add in a combination Smoke & CO detector due to the ERV unit that could possibly pull in fumes from car exhaust or from a lawn mower left running besides the intake. In our final picture, we showed a picture of exterior, showing how we took care of adding in electrical outlet outside.

Sean,
Thanks for highlighting the important but little known nuances of interior framing. I’m willing to bet that each example you cite is largely new to most homeownwers who rarely get the chance to see or learn of what goes on with and within their walls. Walls are seen as walls…realistically they’re critically important subsystems of the architecture of the home itself.
Thanks,
Mike