![]() When completing Code Compliance Testing or doing a “Verified” Rating one has two options when it comes to Blower Door Tests. Today we are going to look at the single point test (802.5) using a smartphone app from The Energy Conservatory (EC) called iTec RESNET. We are also going to look at an issue that can dramatically impact the results if one is not careful.
When completing Code Compliance Testing or doing a “Verified” Rating one has two options when it comes to Blower Door Tests. Today we are going to look at the single point test (802.5) using a smartphone app from The Energy Conservatory (EC) called iTec RESNET. We are also going to look at an issue that can dramatically impact the results if one is not careful.
A little history: One of the first issues I had to deal with when moving into the Chicago market was certain programs & even building departments requiring that one provide a TecTite report or “.bld” file for all blower door testing done. While this might not be an issue for those that use EC’s equipment… if you are like me & use Retrotec’s equipment (or maybe even another one like Infiltec) this can pose a small issue as the software is designed for & only lists their equipment. Welcome to the workaround…
Setup:
After installing the software, you will see an icon like the one pictured above. This brings you to the project screen. If this is your first time using this you should start by clicking the icon circled in red which is for some basic default settings.
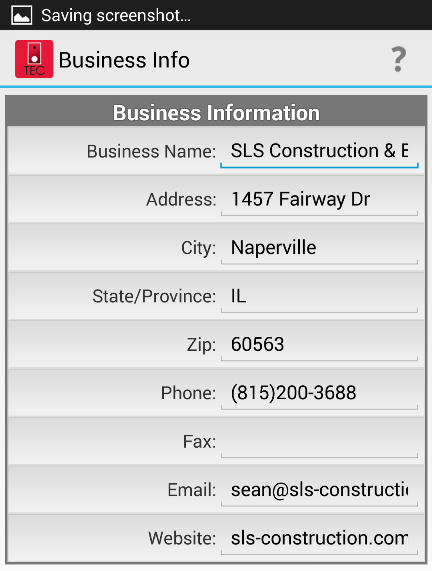
This first one is where you enter in all your business information.
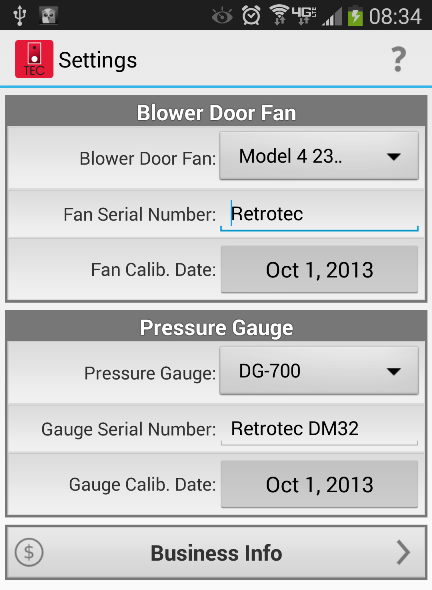
This one is where you enter in the equipment info. As you may recall, per RESNET specs for single-point tests, one should include this information on all test reports (and yes I blanked mine out on purpose). As a quick side note, after a little finagling, I elected to use EC’s Model 4 Blower Door fan as it more closely resembled my setup. While this doesn’t really pose an issue on single point tests, it sure does on multi-point tests (which this app doesn’t handle or do.)
After this has been completed one should create a new test / project file. This is done by clicking the + icon circled in black above.
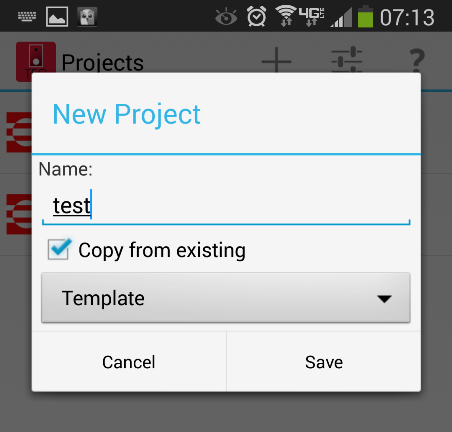
 If you have multiple clients, you may wish to create a template for each one. By doing this you can use the “copy” function to prefill in the “Customer Information” which I will cover below. I haven’t fully reset all my templates back up as I switched phones & haven’t gotten there yet. If you have multiple clients, you may wish to create a template for each one. By doing this you can use the “copy” function to prefill in the “Customer Information” which I will cover below. I haven’t fully reset all my templates back up as I switched phones & haven’t gotten there yet. |
Getting Ready to Test:
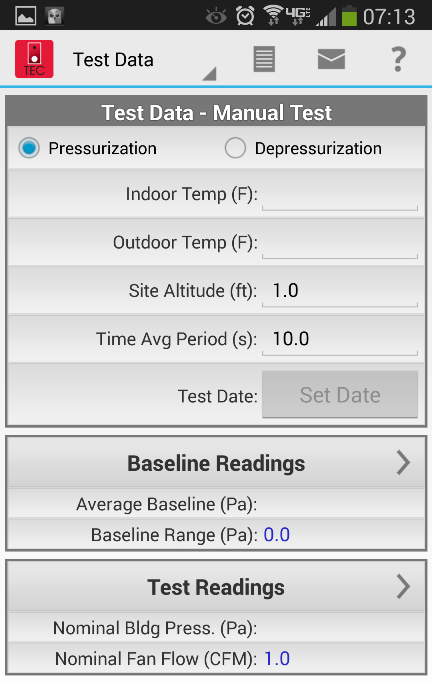
In most cases, you can easily have the next screens mostly completed from the comfort of your car or office. This first one is the generic start screen. From here click the drop-down menu where it says “Test Data”
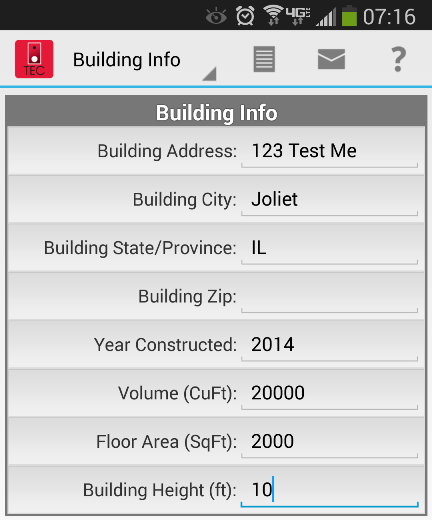
This is the Building Info screen where you enter in the address & necessary characteristics. Building Height is not really required, but I added it in anyways for this example.
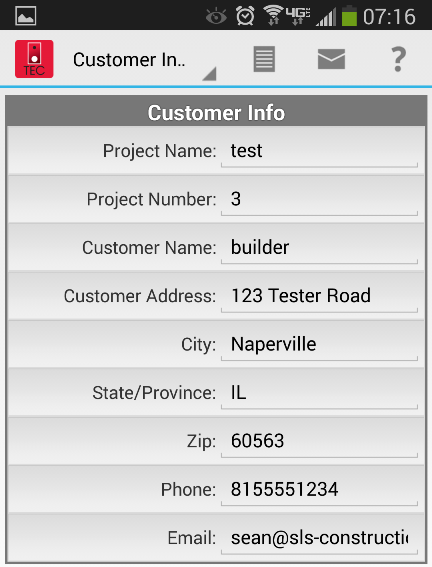
The next screen is the Customer Information screen – the project name should reflect either your naming convention or be meaningful to the builder: for example subdivision & lot number or maybe even permit number
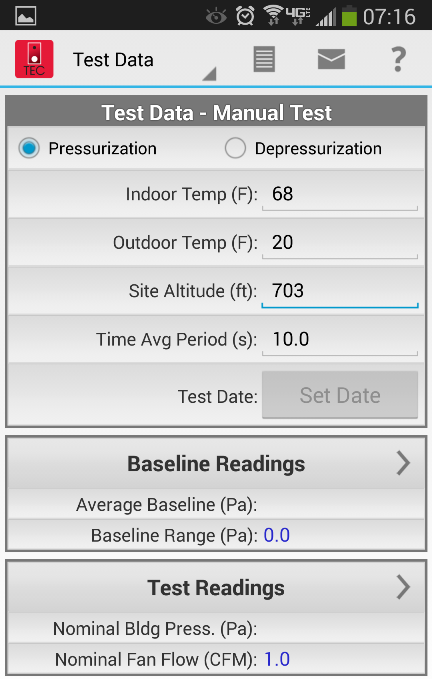
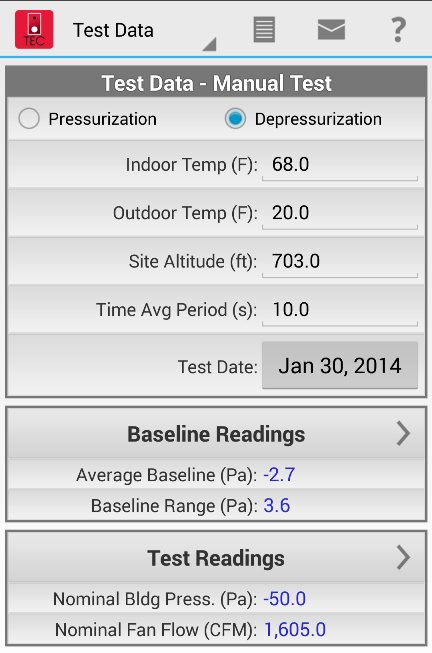
Now we get back to where we started & that is with the test screen. Be sure you enter in the temperatures correctly & also the altitude (especially for those where a correction factor is needed.) By clicking the set-date button it will default to todays date. Now if you have messed up & you saved a template with a past date in it, no big deal click on the date & adjust accordingly. One other check is to make sure you select “depressurization” if you are doing that test – unfortunately you cant have it default there even though that is the bulk of the tests.
The next section is where you enter in the 5 required baseline readings. Remember you do not adjust the baseline, you simply enter in the 5 required readings.
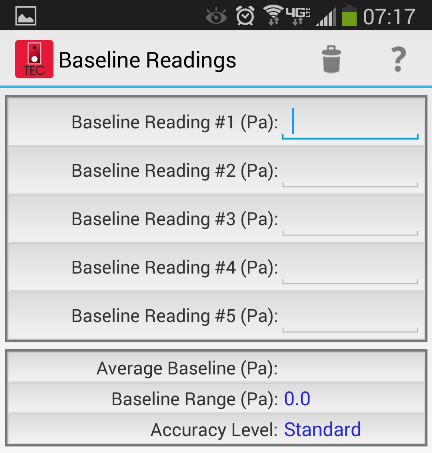
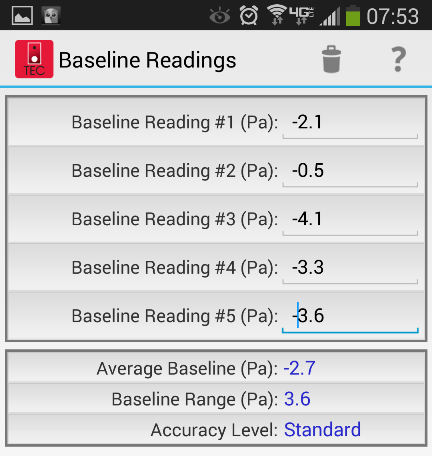
Be sure you enter them in properly (yes we will come back to this) & do not hit “accept” on your equipment – one is only supposed to record them. When this is done simply hit your back button on the phone. ***Depending on your phone, this can suck – my old one had a slide out which allowed me to hit the “-” key whereas as the touch screen shares it with the “.” key. I generally have to enter them in using the positive function & then go back to each one & hit the negative key in the appropriate spot.
The next screen brings up the test results – as I have my manometer set to give me the CFM @ 50 pa, I simply use -50 for the nominal building pressure. If I didn’t have that set, I would enter the actual pressure showing on the gauge. As a reminder, it is always important to double check your settings.
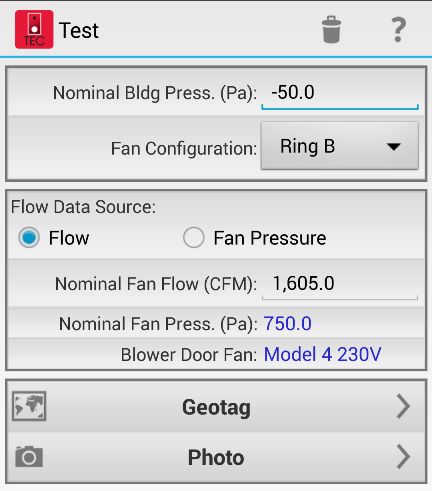
One feature I always use is the photo option to prove what the reading is. One feature that never seemed to work with my 3G phone was the geo-tag, but hopefully it works better on the 4g networks.
This is essentially what you should see when you have entered all the data in properly
The Report:
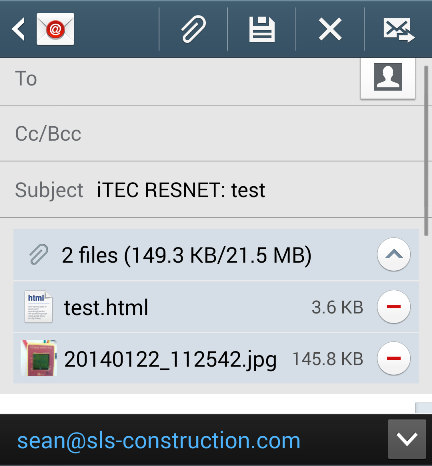
You got to love an app that has all the necessary information being automatically generated for you. If you look at the screen above you may notice 3 icons – a report, an envelope & a question mark. The page looking one which is the report allows you to view & also email an HTML report file. This is what the email option looks like which includes the blower door picture taken.
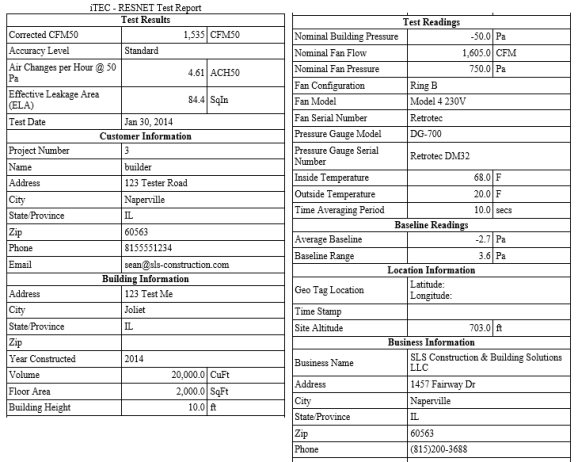
This is a copy of the report generated – which has been cropped & modified a bit to fit here.
The Big Issue:
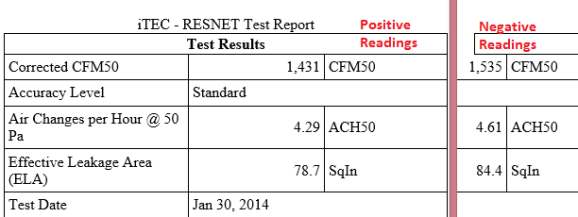
If you scroll back up a little you may notice the baseline reading screen & the associated issues we had with it. Below is what happens if you simply enter the baseline readings in & leave them positive assuming they are actually negative. In this case there is a difference of over 100 CFM’s & .32 ACH difference. Not only might someone fail, but if this is a verified rating you might run into issues when your QA provider runs the test & comes up with the correct reading as you probably have gone past your allowable margin.
