A traditional “floating” shelf looks like the shelf (or slab of wood) simply sticking to the wall with no visible support. In most cases this is done with a specialty metal hanger mounted to the wall with two or more pins mortised into the shelf which are held in with a few screws from underneath. In our case we wanted an L shaped shelf for the nursery to hold books, toys, and knick knacks.
Getting started:
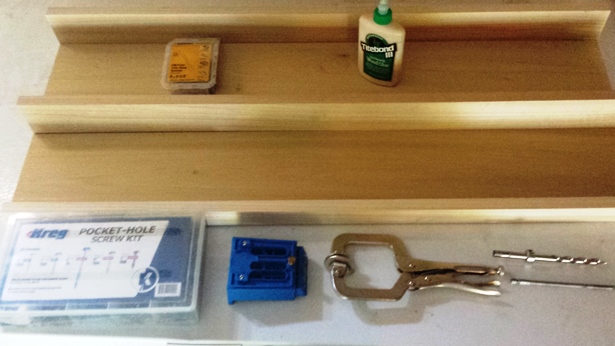
As this was to be painted I simply choose a 1×4, 1×6 & 1×2 in popular & cut to length. In order to “hide” the fasteners I used some left over cabinet screws and my Kreg Pocket Screw Jig.
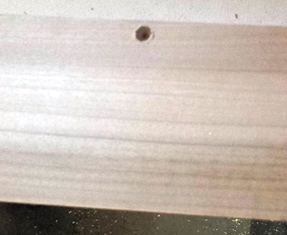
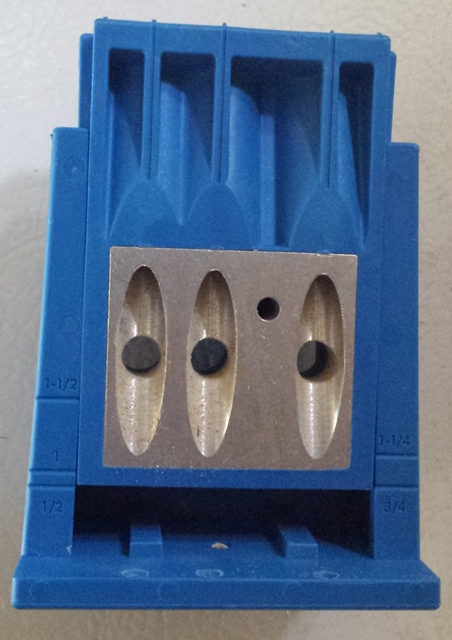 In many cases this jig is used for building face frames for cabinets, but it can also be used for many other things. The numbers engraved simply show how far from the edge the pocket for the screw will end (don’t worry there are a lot more on the side also). You need to keep the screw back far enough to leave some “meat” for the screw head to hold onto & to ensure the screw won’t go through the other material you are connecting it to.
Assembling the unit:
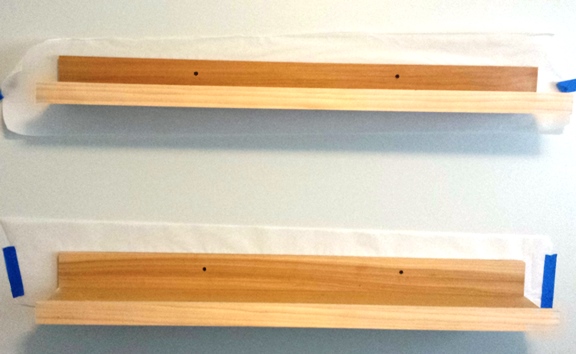
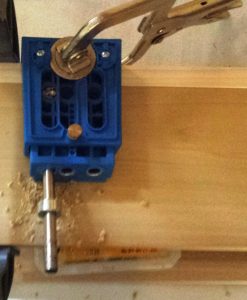 Do as I say, not as I do… Yeah I pulled a rookie mistake here which I can’t even believe I did, but I left the picture in to show you how the setup should look… well mostly.
You actually should not include the other piece in when drilling the pocket. With that the jig is clamped to the piece where you need to create the pocket and the specialty bit is used with a drill.
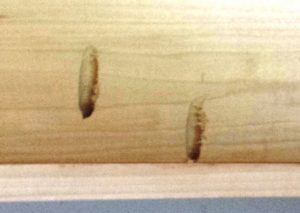
So what happens if you add the other piece in & forget to adjust it… well you end placing the pocket in the wrong spot (right side) and you end up having to drill another one. After drilling out all the pockets I glued the edge, inserted the screws & rive them in pulling it tight.
 I just used pocket screws for the front 1×2 edge, but opted for a more traditional approach for butted joints on the back. As there was no worries about seeing them, I simply used a countersink bit (to make sure the screws didn’t stick out) and drove in a few screws with some glue.
Mounting the unit:
While I went to some length to make sure one couldn’t see the fasteners, I changed tactics for mounting it & simply used the countersink bit again and drove a few screws into the studs. When the unit is painted you won’t be able to see the them, especially when it is fully loaded up. Want to move it or remove it later – piece of cake.
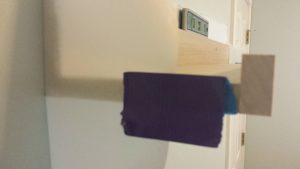 QUICK TIP: If you are like me & you don’t like painting / need to get it up before it is painted… As you can see above I have placed parchment paper behind it making it easier to paint. The back was already sprayed with white paint to make sure it was sealed. Ahh but how do you make sure the paper stays in place as you mount it – add some painters tape to the wood & then use duct tape over it & the parchment paper to hold it. (Painters tape can’t hold onto it well enough)
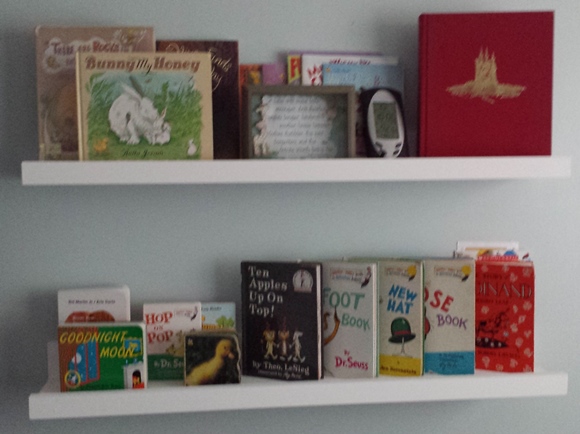
The finished product:
The end… right now it holds books, later on it will probably hold a bunch of nick-knacks after I build a book self.. ut that will be for another day

Very good tips explaining step by step way to fit a shelf without enabling any support to be visible…hmmm…using wits in mounting the shelf was a good one…..