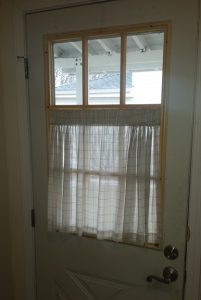
 Talk about a door that has seen better days – so the question becomes, do I replace it or can I give it a facelift? Maybe you like the glass but your neighbor shot it with a BB gun, so how do you replace the glass? Got a broken grille – do you have to replace the whole unit or can you replace just the grill? Well let’s take a look at a replacement I just did and see if we can help answer some of these questions.
Tools Required:
This is one of the simplest projects out there – you will need;
- A second person
- A utility knife
- A Philip’s screwdriver
- A scraper (a cheap one with a straight razor blade works fine)
- A tape measure
You need measurements:
Repeat after me – there is nothing standard. You must measure – the window I am going to use as a replacement for this one I got at a great price because someone thought everything was standard… So how do you measure for replacement glass – well in most cases you need to measure both the rough opening & the unit size to make sure the glass you order will fit.
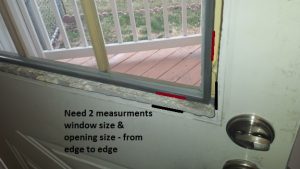 Sorry but the pic I took of the full opening didn’t come out so… The red lines equal where to measure for the unit / window while the black is for the opening. Yes you need both the height & width of both.
To get to this point, there are generally some little plugs you need to pop out to expose the screws on the inside. Generally they will easily pop out with the utility knife. While you have the knife handy, if there is any caulk or paint around the edges, lightly score around it to break the frame. free from the door
> Do I really need a second person – in short no, but yes. Most windows have a sealant that is applied to the outside which will prevent it from just following out, but the last thing you want is for it to have failed & the window to break as you don’t have a replacement just yet. Do I really need a second person – in short no, but yes. Most windows have a sealant that is applied to the outside which will prevent it from just following out, but the last thing you want is for it to have failed & the window to break as you don’t have a replacement just yet. |
Once they are all exposed, have your partner in crime stand outside & lightly press on the window to make sure it doesn’t pop out. Unscrew the inside & lightly pull it away from the door. If something is sticking, figure out why – did you miss a screw or… Once it is off, congrats you have exposed the glass & opening allowing you to take 4 measurements – the width & height of the unit & also the opening. You can then place the frame back in place & screw it back together. With this you can go to you local glass / window / door company or home improvement store to order a new one.
> Found a unit you think will work but there is no measurements on it? Measure the screw locations (width & height) on the replacement & the one at home – if they are spot on – winner, winner… Found a unit you think will work but there is no measurements on it? Measure the screw locations (width & height) on the replacement & the one at home – if they are spot on – winner, winner…
Also as a quick reminder, if you are buying windows it is always width x height |
Replacing the unit:
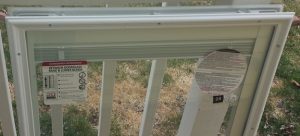 Step 1: Verify – Congrats, your new window is in & now it is time to change it. Make sure while it is still wrapped up that the new unit will fit (see Tip above). Once that is done, feel free to unwrap it & place it to the side.
Step 2: Remove – Now you can simply unscrew the inside frame like mentioned above. On the exterior, lightly score around the window & lightly pry it away from the door. I generally start at a bottom corner & use the razor to help jiggle it loose all the way around. Then I add a little pressure on the inside & do it again – in most cases it pulls away quite nice.
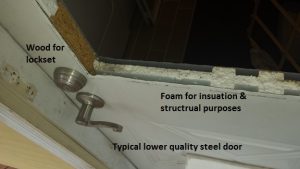 Now that the window is out, you can see how your door is built. In this case you are looking at an older cheap steel door. Newer doors (due to codes) are generally all foam & wood resulting in better energy performance. Might I have been better off going with a newer door built to modern codes – maybe. With that as this door has a doggy door in it, I would say it wouldn’t be worth it.
Step 3: Clean – On the inside & outside it is time to clear any remaining residue from the sealant, caulking or built up paint.
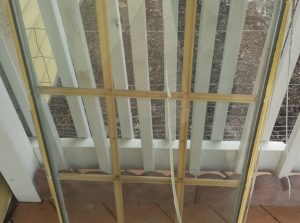 Got a unit where just a grill is broken? Essentially you can follow all the steps above as you can get a replacement grill kit from most home improvement stores (probably special order also). Once you have the unit out, you will need to pry the exterior grill from the window, scrape of the reside & clean it thoroughly. Depending on the kit you may simply apply the grill directly to the window after taking off some protective strips, or you may have to apply the glue yourself. Quite simply, make sure you follow the manufacturer’s directions.
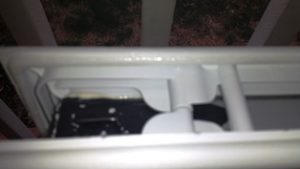 Step 4: Insert – This is a close up shot of the new window unit where you can see the “sealant” bead around it. This one is not a real tacky version so it gives you some wiggle room when you insert the unit. Simply place the window unit in & center it from the outside. Have your partner in crime place the interior piece in and start inserting the screws.
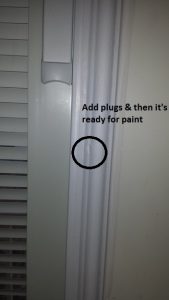 Step 5: Tighten it up like a car tire – For anyone that knows about changing car tires, they know not to simply go from one lug to the next & tighten it up fully. Rather you do one on the left, then one on the opposite side, etc… In this case I go for the left bottom, right top, bottom right, top left & keep going until everyone is in place & snugged up. Then do one final lap tightening everything up fully. Then you can simply insert the plugs.
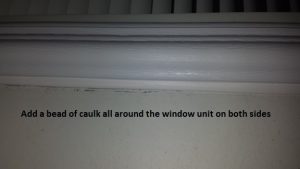 Step 6: Caulk It & Paint / Stain? – Once everything is done you should run a bead of caulk around the interior & exterior of the window frame especially for steel doors. Once this is done & dried, you maybe able to leave it as is (PVC or pre-finished only), paint it, or stain it with a gel stain depending on your entryway.
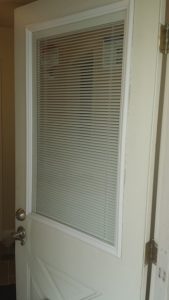 Not painted, but oh so much better.
Wood Doors:
While wood doors are not to popular up here the principles listed above are similar. In most cases though wood molding is what holds the glass in. To remove you simply use a putty knife and gently work it loose.
If you have just a single pane of glass, you can simply head to a glass store & have one cut for you. Want to upgrade to a more energy efficient option – you will need to measure how much room you have & have them order one that will fit in (probably with some trimmed down molding).
