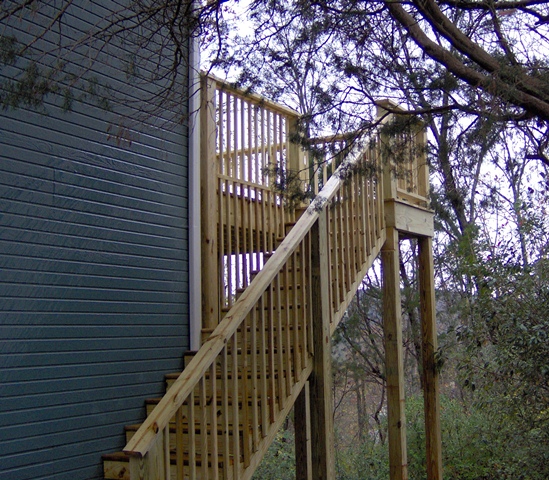
 In all my years in the building industry, the two biggest items that I see most people stumble with is math and stairs –generally you either you get it or you don’t. In a way it is funny listening to some custom home contractors compare staircases to black holes as they do nothing but suck time & money. For many production builders they generally don’t have that issue, but simply have a team or “that guy” that does nothing but stairs. Shoot I have even seen companies hand a candidate a 2×12, a framing square, saw & have them cut a stringer to test their skills. (Heh so you say are a Master Carpenter, huh?)
The Back Story:
This last week as part of the SkillsUSA Alabama State Competition, the Carpentry competitors all got to try their hand at it on the last day. While some students did pretty good most of them had some issues. To make it more interesting the plans provided required one to do the math as the answers one would get from a Construction Master® calculator (or just remembering 7/10 or 7/11) would not give them the answers they needed. With this in mind, let’s take a quick look at some of the code basics, the results and tips to get it right the first time.
The Codes (2009 IRC):
- 311.7.1 – Stairways shall be a minimum of 36” wide
- 311.7.4.1 – Maximum Riser Height is 7 ¾” (max. height difference of 3/8” based on all risers)
- 311.7.4.2 – Minimum Tread Depth is 10” (max . width difference is 3/8” based on all treads)
- 311.7.4.3 – Stair tread nosing must extend out ¾” to a maximum of 1 ¼” past front of riser unless the tread is 11” or larger (just like above 3/8” max. discrepancy is allowed)
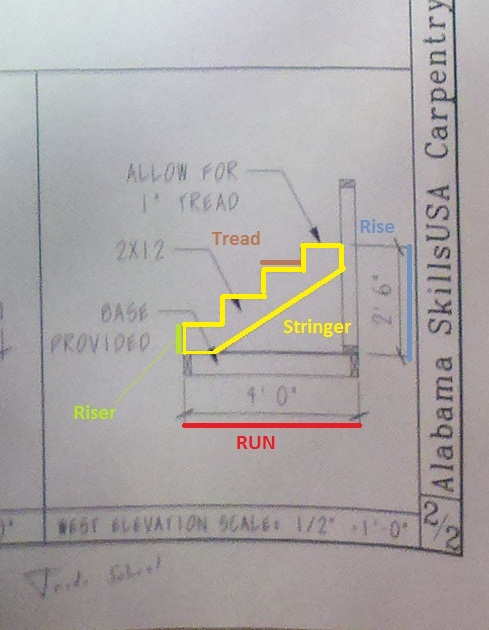
The reason for the codes? Quite simply it is because it is what feels normal to most individuals, and helps eliminate tripping hazards. For example in a commercial building I worked at, we lost power & the emergency lighting failed to kick on, yet I was able to still head up the stairs without tripping.
The plan & the results:
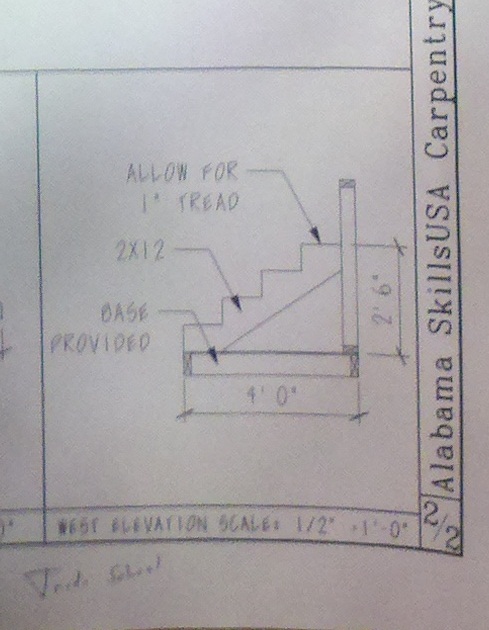
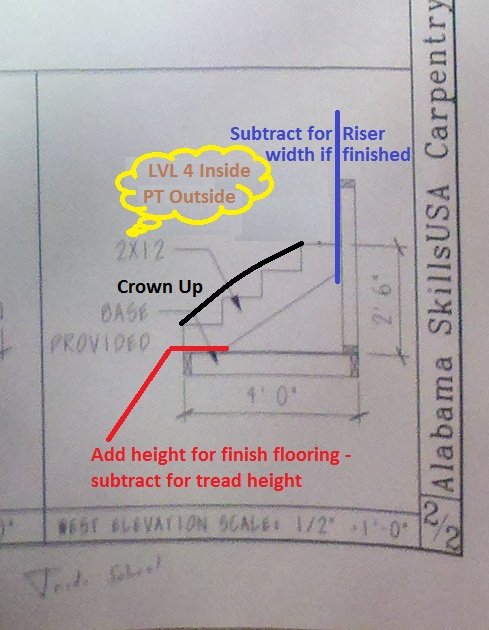
This is a part of the plan that everyone got – a simple stair stringer with 4 risers & 4 treads. What made it more challenging is if you simply plugged the rise in to a construction calculator, you would end up with 3 treads. If you plugged in the run @ 4’ you would end up with 6 risers. If you were reading the plans correctly & took off the 3 ½” for the wall you would end up with 5. In order to get the correct size you had to take the rise & divide that by 4 (number of risers needed) and then take the run & also divide that by 4 (number of treads required) which ends up being 7 ½” & 11 1/8” (maybe).

Correct number of risers & treads, yet it extends out past the end of the platform & does not appear to be tall enough. (As an FYI, at the end of the day a fresh set of judges is brought in to judge just what was built. This was put in place here to help prevent any perceived favoritism, so I did not pull a tape on any these projects & am just going off the pictures)
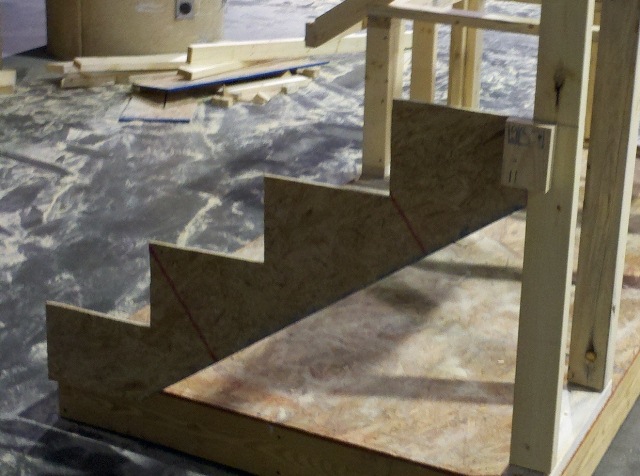
Dead on, but is it – just what does that allow 1” for tread really mean?
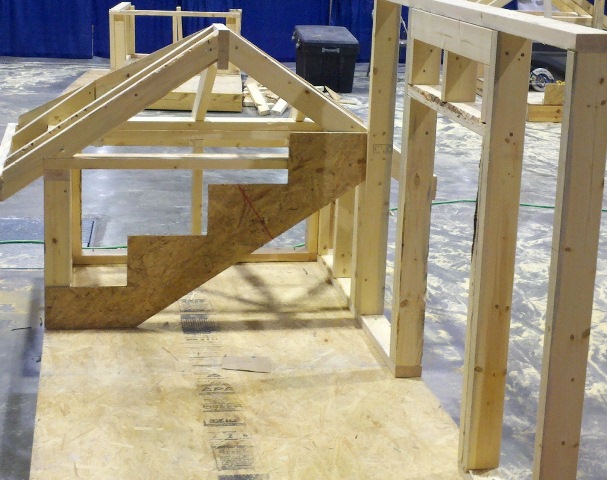
The first one completed & the only one to nail it to the first day’s work. Interestingly if you look at the bottom step, you might notice that the one riser is an inch or so shorter. So is it right, or is the one above? In the field that question is generally a little more clear cut whereas in a competition, this is one of those items you might want to get clarified when the plans aren’t fully specific.
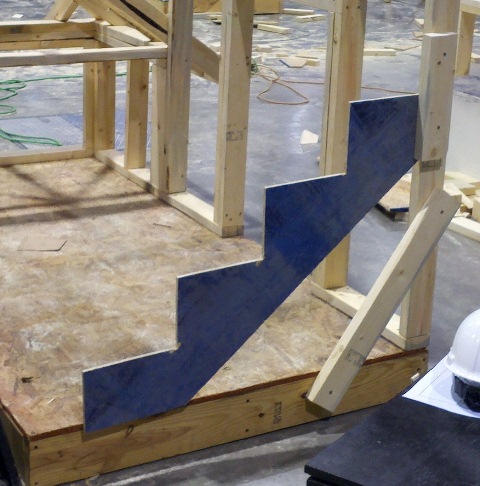
Ah the dreaded route memorization issue – why steps always have 7” risers & 10” wide treads except for the bottom one & top…
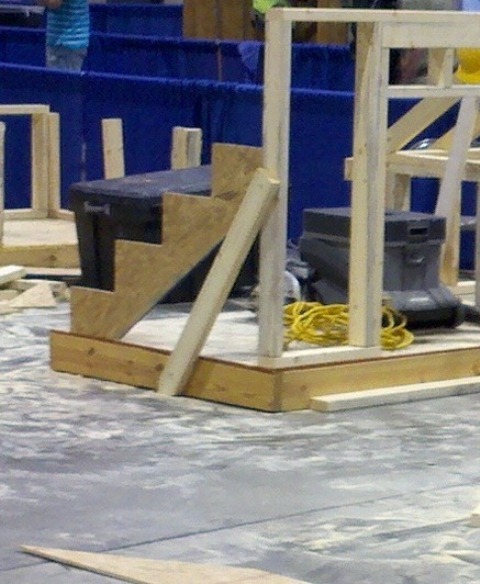
Hmm, another one? Interestingly on this one, neither the bottom nor the top step is trimmed down like the one above
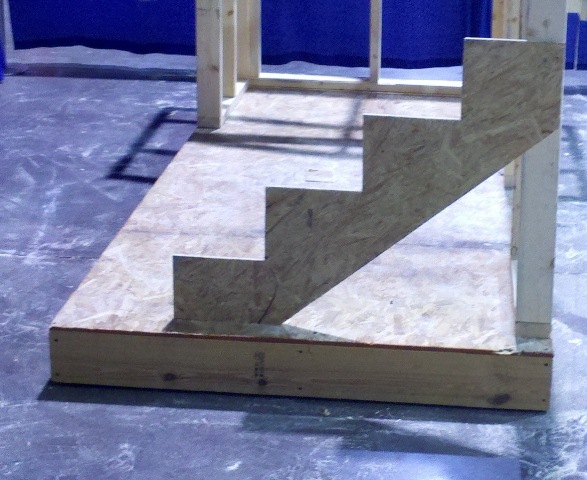
Ok, this one managed to get the height & trimmed the normal spots, however not only was it tacked up contrary to the plans, but they failed to account for the run required as it appears that route memorization reared its ugly head again
Amazingly off the same set of plans we arrived with 6 different stringers and yet they could all still be wrong. When one is in a competition like this you need to make sure that you ask for clarification on items you might not be sure on. Is the 2’ 6” mark for the top of the tread or stringer? Is the bottom step really the bottom step / do we need to remove some for the tread? Is the top step really the top step / do we need to account for any riser thickness? As an FYI, me showing & using these plans is not an issue as all the ones that have been or are used in competition are shared with all the teachers afterwards so they can use them as guides & teaching tools.

Some quick tips & reminders:
- Buy a set of these stair gauge clamps (shown above) as they make layout a snap – just be careful that you don’t cheat the corners
- For exterior stairs, the wood needs to be Pressure Treated with the crown up. One trick we also employ is finding the biggest knot(s) and we adjust our cut layout to make sure as many of them can be cut out.
- Speaking of exterior stairs, don’t forget that the rise is from where the landing will be up to the finish height which in many cases can be difficult if the ground slopes away
- For interior stairs we prefer to use LVL’s due to their strength & wider width. If you use a regular 2×12 – please see above
- In both cases, don’t forget to account for the finish floor heights, tread material & riser finishes. (see picture above)
- Route memorization is bad, especially the 7/10 one – you have to do the math. If you have a Construction Master Calculator it is as easy as typing in your rise & hitting the stair key to get the numbers you need. (as an FYI – they default to 7/10 for the baseline)
- In most cases you really want to shoot for stairs being around 7” tall & 11” wide. In case you have a calculator that is defaulted to 10, there is an easy fix – in my case I simply type in “11”, hit “inch”, followed by “CONV” & hit then the number 9 – now my default tread width it 11 inches instead of 10 until I change it or do a reset to default

How do you get through a discussion about stair construction without even mentioning why a 2×12 is the proper member to use for the stringer?
Interesting thought & to some extent as this one was written more for the “trades” &/or upcoming students learning about the trades I am pretty sure they know what size material is needed. Personally I only use LVL’s inside & PT 2×12’s on the exterior.
Although I’m having trouble finding mention of it in the IBC 2012, I had always thought the rule was that after notching the stringer that there should be a minimum of 3 1/2″ of solid wood left between the deepest point of the notch and the opposite finished edge of the 2×12. If this is the case, it may allow a 2×10 to be specified in some cases. Does any of this ring true?
No it doesn’t & even if it was allowed I wouldn’t use a 2×10 as I don’t think it would be structurally sound enough without doubling up or something similar (especially with todays wood). The other catch is to many people also overcut which cuts down the strength even more.
As an FYI – the IBC is for commercial buildings only, not residential & many commercial applications require an engineers stamp
Umh, I have worked from a number of engineered plans over the years. While you and I might just grab a 2×12 to assure it is over-built, an engineer may well spec out a 2×10 depending on span and stress. Roseburg has a chart that states that an 1-1/2″ x 9-1/2″ LVL can be used on horizontal runs as long as 6-1/2 feet!
Good point, but that is an engineer that has hopefully done all the math correctly for that species of wood
As for LVL’s / engineered wood – that I am a lot less worried about compared to today’s fast grown wood
FYI – love your comment above about if you don’t find the time to do it right, you will find the time to do it over
Thanks for chiming in
This is a great article. I’m one of those guys who tested critical carpentry candidates by having them lay out or at least diagram a stringer problem. Tells you a lot about their past experience, how their mind works, their attention to details, and their willingness to communicate when things are not clear. This has been a good refresher for me. Cheers!
I do not see the problem. The plan clearly gives you the rise and the run and the tread thickness. The bottom riser would have 1″ cut off making the total height 1″ less than the total rise given. The run would be 11.125″. This isn’t rocket science, its simple math. The Pciture even shows how they should look finished. Add 3/4″ to the run and you have a 12″ tread. The rise is 7.5″. Now I would not make them on the job this way, but that is what the plan calls for…
I think you missed the point. There is more to be taught than just math in this project. The plan is clearly…not clear. If nothing else, is 2′-6″ to the top of the sub-floor or the top of the 2×4 base. I can’t tell. “Why of course it’s the sub-floor!” Really? And if you are wrong? If that was not made PERFECTLY clear by the engineer (and it should be), what else is being presumed.
Part of a skill set is attention to detail, and COMMUNICATION when things are not crystal-clear. And “yes”, I’ve gotten plenty of engineering plans that have ambiguities that need to be clarified. It’s a PIA, but clarification takes a lot less time than tearing it out and re-rebuilding it. Two things I teach my guys: “you can’t over-communicate with me”, and “when you don’t have time to do it right, you WILL find the time to do it over.”
Hi Everyone,
I am finishing The remodel of a home, and there is a three stair riser between living and dining room. We pulled out the old carpet and install hardwood floor‘s. The inspector noticed that there is a more than three eights inch difference between the risers high. Question does a three stair step need to meet code? The home was built in 1998, anyone know what the tcode said back then?
I haven’t seen anything that says only X# of steps or more must qualify so yes you need to fix that. As for what the code back then states is irrelevant as you are remodeling which means you are to build to the current standards. With that if memory serves me correctly it was probably less than that.
As for the fix – well if it is the bottom step being to high I have seen people install a second landing. Granted most times as soon as the inspector splits they remove it but if you should sell or someone has an accident there….
With that there is one other legit option & that is to ask for a variance – all AHJ’s should have a process for this