In an earlier post, we created a simple raised garden bed from 2×12’s – ahh but what happens if you want taller than that. While we have done some with 6×6’s around 3′ tall the costs for those now is astronomical. In this case we simply went with 4×6’s which was about half the cost.
Getting Started:
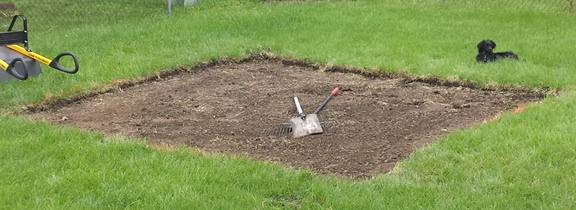
Step 1 – remove all the grass from the area. In this case we were going with 2 beds both 4′ x 12′ – one approximately 2′ tall with the second one being made from 2×12’s like before. As it was so late in the season when we started it, instead of investing a small bundle in gardening soil we decided to only do plant in one of the smaller sections & let nature break down some mulch in the rest for next years plantings.
Ahh but what to do it – well fortunately we had a section of yard where we removed some rock and..
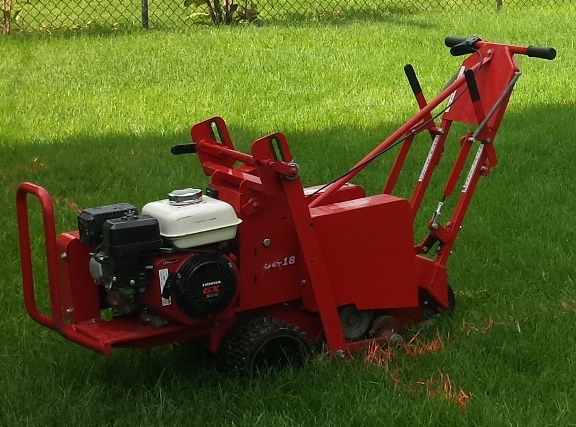
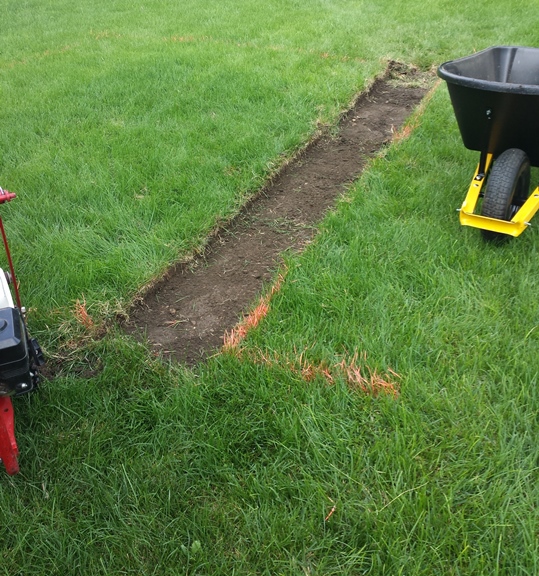
The tool of choice, a sod cutter. While one could theoretically use just a shovel – that is to back breaking, while a rototiller will just leave a big mess and take about three times as long.
Tool of choice to move the sod – a shovel to cut into a manageable size & a wheelbarrow to move a few at a time.
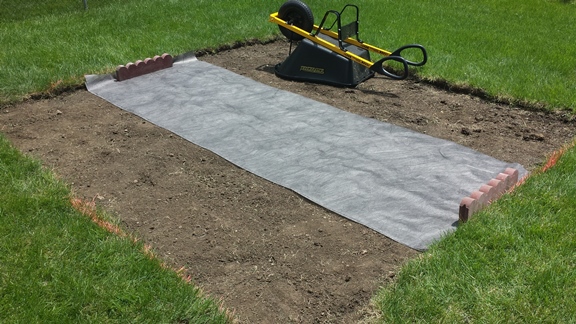
Place 2 layers of weed blocker down for the walkway in between
This is how we handled it for the 2×12 version – for the 4×6 one also ran under while the other ran up the face and was tacked in place so the second row would hold it. (You may have to run yours under and up also if the rock won’t be that high though)
Supplies & Tools Required:
- 6 pieces of 1′ rebar
- 1 box 10″ TimberLocks (50)
- 14 4x6x12 PT wood
Essentially the same tools required to build the compost bin are required here with the exception of the lineman pliers & cutters shown below. We also had to change the bit used to handle the TimberLocks (which they generally provide in the box anyways.) The only other addition is a utility knife not shown.
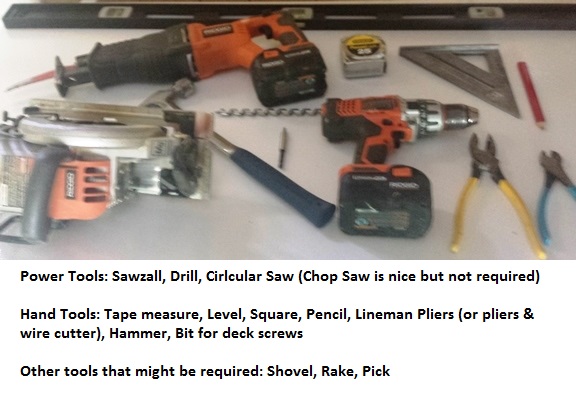
Tools Required
Pre-cutting the pieces:
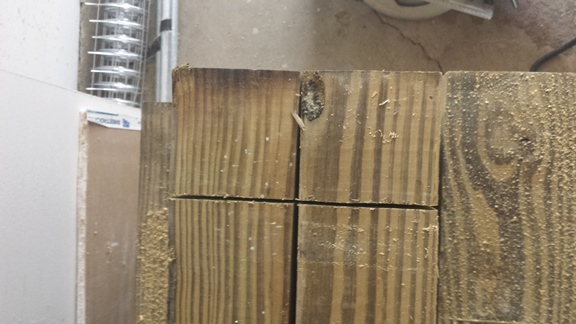
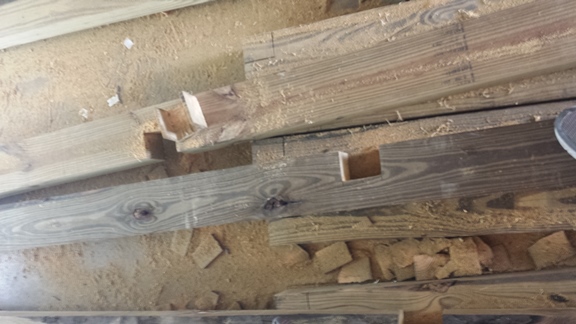
First I gang-cut 4 of the 4×6’s in thirds for the end panels & two tie-backs (to keep the pressure from bowing out the wood any)
It is then time to create a half-lap joint on all the ends. The easiest way is to simply line up all the boards and do another gang-cut across the top…
then cut down each side…
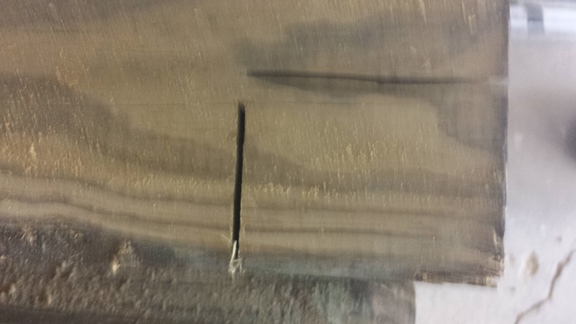
and finish it off with a sawzall.
The tie-backs:
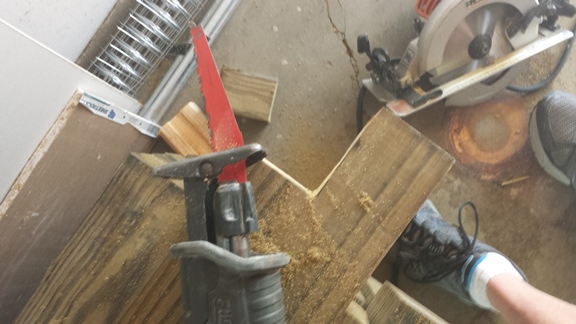
The easiest way to handle the tie-backs also starts out by laying out where the half-lap joints will go on 4 of the boards. Make your first cut on the left line followed up by the right line. Then simply run the circular saw multiple times in-between those two cuts…
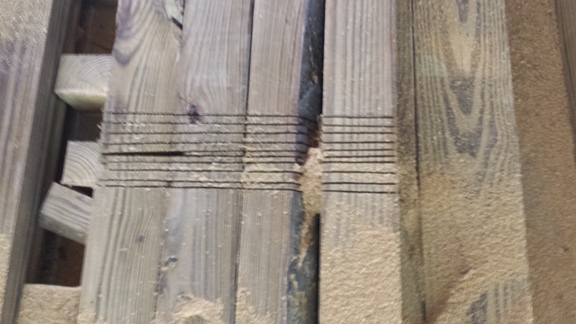
Grab a hammer and knock them out…

now as the circular saw won’t get deep enough you have two options – free cut with a Sawzall or trim down the lap on the two tie-backs – yeah I got some skills 🙂
Assembly:
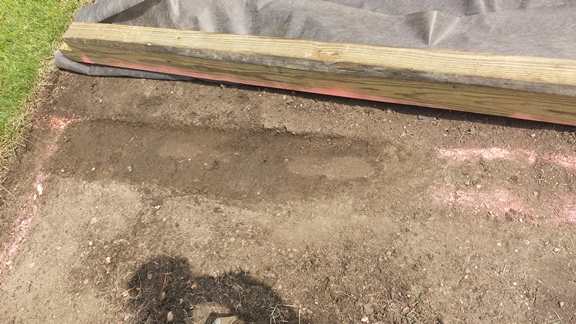
Heh, not so fast… while one would could hope that the ground is fully level – yeah it rarely is
I generally find it easiest to mark out the area needing to be scrapped down…

and level it out with a flat shovel.
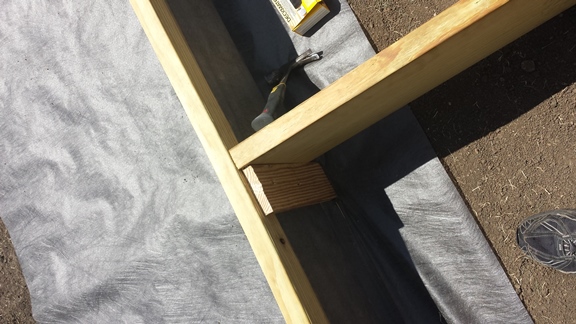
Once everything is ready to go, predrill 2 holes in each of the long pieces and one in each short piece. Drive a piece of rebar in the long piece & layout everything else to ensure it is square. Continue to set the rebar while ensuring you don’t shift the bed.
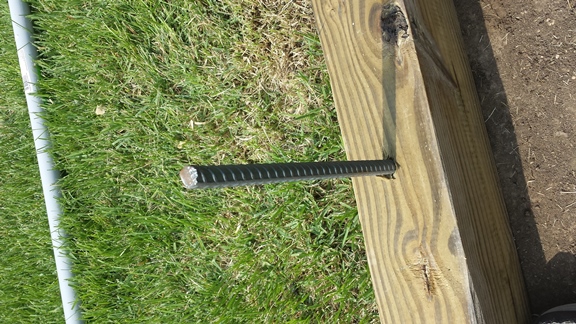
QUICK TIP: to ensure everything is square measure from the top left corner to the bottom right corner and then reverse it. If the measurements match it is perfectly square. (Make sure you place the tape the same way both times & read it the same – for example left side) If you are off by say an inch only bump the boards you need to 1/2 that distance & re-measure.
Final Steps:
The final steps don’t take long at all & in fact it is just like stacking Lincoln logs on top of each other. The only trick is to keep it plumb. With an impact driver all you need to do is put a few TimberLocks in from the top & occasionally through the face to help close up any gaps. For the 2nd & 4th course I added in the tiebacks & drove the TimberLock in through the face. This is a picture of the inside view.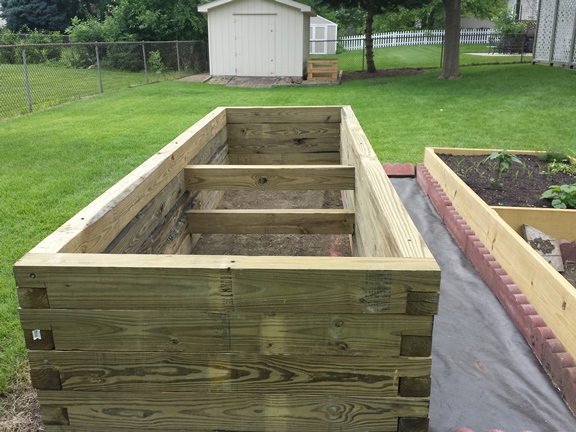
A view from the side with the one planter filled with gardening soil.
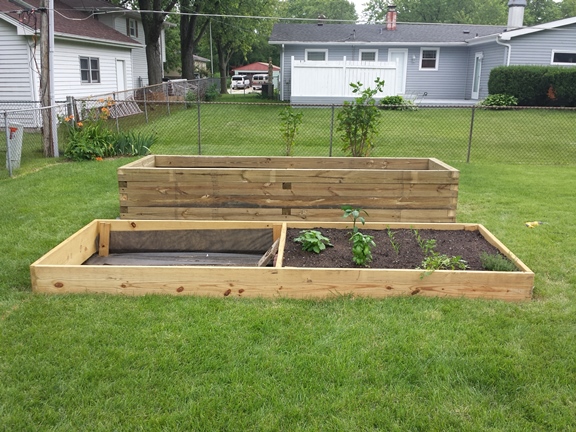
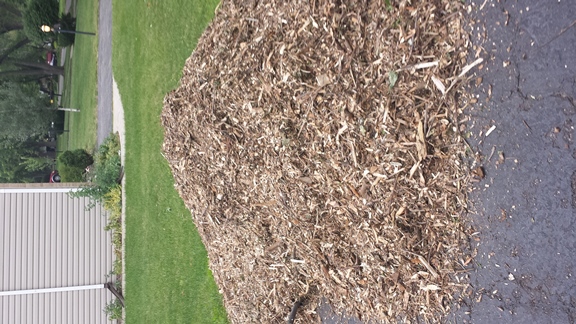
Our area drops off free mulch which we used to fill the remaining garden beds approx. 1/2 way for the small one & 2/3 of the way for the large one. We added a little bit of compost from our bins to the bottom and some worms to help speed along the process.
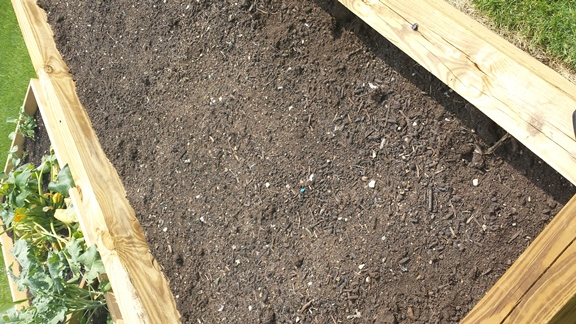
We topped that off with a nice layer of gardening soil so come next season we will be good to go.
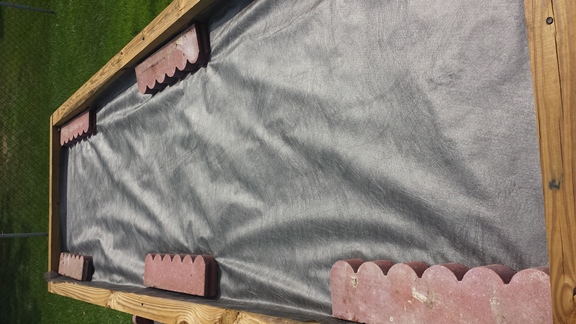
As this was not going to be used for a while and on order to cut down on weeds we covered it with some weed block and weighed it down with a few extra concrete edge pieces. If it is late enough in the season you may wish to simply cover it (like we will do with the other bed) with a good layer of leaves which you can then till into the soil or add to your compost pile.
With that – happy gardening and may you have a bountiful harvest…
