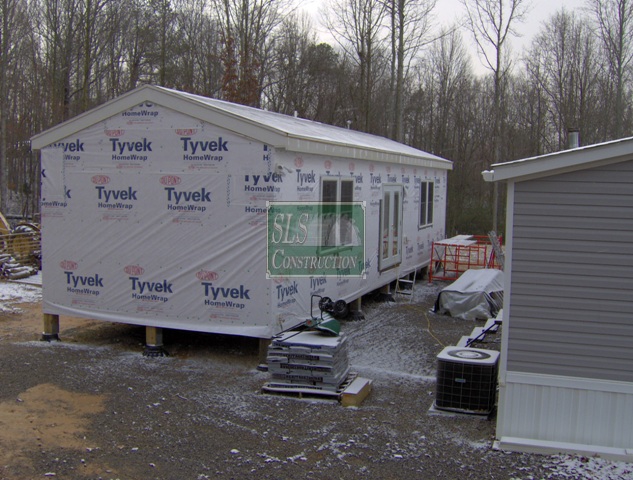
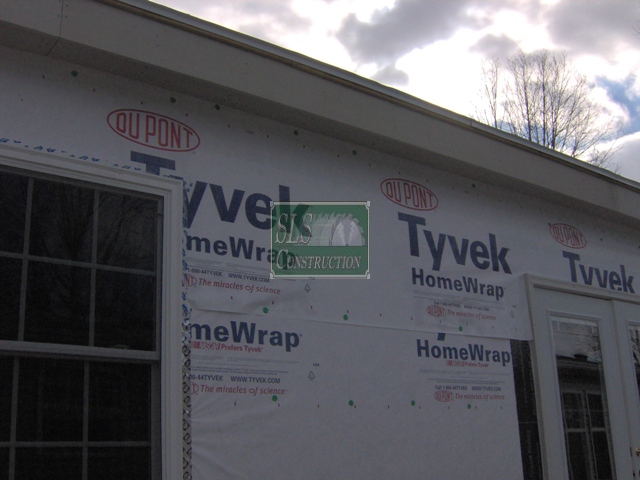
 Sorry, for the short break we took on this series entitled Looking Back & Looking Forward. As a reminder we are reviewing a green home we built over 2 years ago, the lessons learned and more importantly, how we can (or even how you can) utilize those lessons on future builds. In our last article, we covered drying in the roof and the choices we made there. In this article, we are going to take care of the remainder of the “Dry-In” process.
As a reminder:
Drying In for better lack of a term is making a house impervious to the rain or short for Dry Inside. In short, drying in a structure means that the roof has been protected with at least a layer of felt, a product like Tyvek Housewrap has been installed, along with all the windows and doors. In Australia, they actually call this stage the “Lock Up”, while the interior trim work is called a “fix.”
Contrary to popular belief:
- This is actually one of the most important phases of construction.
- You do not have to have your siding installed before it is considered “dried in”
- You do not have to have your roofing installed before it is considered “dried in”
- Those cheap perforated plastic house-wrap’s are not as good as a real Housewrap
The Walls, Windows & Doors:
As we mentioned in earlier posts, the walls are sheathed with a product called TallWall OSB, which is then covered with Tyvek Housewrap & topped off with vinyl siding. The windows were single hung, dual pane vinyl Energy Star rated units with an integrated J Channel built in. We have two different types of doors on this house – a French style out swing set for the main entrance & a steel insulated door for the utility room. The fascia & eve areas were covered with Fiber Cement trim pieces from James Hardie.
Exterior Cladding:
Just like the roof, you have three primary layers that help protect your house: the sheathing, the underlayment, and then the visible cladding. One of the biggest issues I see is that most people believe that the exterior cladding is waterproof like their roof. In the simplest terms – it isn’t waterproof. Granted there are a few systems that are, but vinyl, brick, wood, fiber cement, and most stucco systems are not. The exterior cladding is primarily used like an umbrella to help shed the bulk water away from the house.
Sheathing Vs Foamboard:
If you may recall from our Home Energy Modeling article, we looked at the energy savings if we applied a foam board to the exterior of the sheathing. While the numbers were not great from an ROI perspective – I can tell you it will help not only eliminate thermal transfer, but help decrease any unwanted air infiltration, among other things. We actually feel so strongly about this, that it is now standard on any additions or homes we spec., design, or build.
Well this leads to an interesting group that says that sheathing is not required & can be replaced with foam board only. I will grant them that it can be done, but then you also have to factor in all the additional metal anchors and straps that are required to help hold the house upright and prevent it from racking. Quite honestly, I think they must have forgotten what sheathing is for which leads me to one other issue. What happens if some straight-line winds hit the house? Hopefully, the strapping was installed properly and will hold the building together, but what is going to prevent that lawn chair or other debris from ending up in the bedroom with you, the siding?
Weather Resistive Barrier (WRB’s):
As we mentioned above, most exterior cladding products are not waterproof, which leads to the most important items in the wall assembly – the WRB. The WRB is needed to help prevent water from migrating into the house when it gets past the umbrella. The WRB’s secondary purpose is to help prevent air infiltration. If any moisture does get past it though (or is being pushed from the inside to the outside), it needs to allow it to escape which leads to a few interesting issues on how to allow that while blocking any trying to get in. This is one reason why you do not see plastic being used and you should steer clear of those cheep box store labeled woven “Housewraps” and stick with a product from Tyvek, James Hardie or others.
WRB Vs Foam:
Folks, I love foam, but no – I am not going to replace my WRB with a foam product. Yes, we install it properly, tape all the joints, etc…, which effectively makes it a WRB, but there are still a few issues that need to be solved first. The first issue revolves around a simple thing called denting – if the product gets dented or hit hard enough, that can cause openings, which causes air to get in, which causes…. The next issue revolves are around expansion & contraction as pointed out in this recent article from the Green Building Advisor and Martin Holladay. (Using Rigid Foam as a WRB)
Flashing, Windows, Doors, and other Openings:
 The biggest trouble area in most wall assemblies is where a hole has been cut or drilled into it. One of the main reasons that we stated that siding does not need to be installed before a house is considered dried in, is to help eliminate these trouble spots. In many cases, the electrician is left cutting into the siding to install an electrical box, or a plumber needs to put in a hose bib. This unfortunately makes a whole in the WRB that cannot be sealed properly with the siding up and allowing air & water into the structure. Make sure you flash everything properly, and read the manufacturer’s instructions to help prevent water intrusion. When you install the flashings around the openings, make sure you start at the bottom, so the next piece laps over it.
 While I would love to dive into a few more issues like rain screens, insulated vinyl, that junk they call fan-fold insulation, we have quite simply run out of space. I think the most important thing one can remember is to consider how water travels & that the details count – that extra 5 minutes or $5 dollars, can save you thousands & result in more comfort for the occupants, be more energy efficient, and guarantee a much more durable structure that will hold up to the elements.

I read this and a number of other articles related to sheathing and the use of foam panels for insulation and was wondering; is it possible or common to place 1″ to 2″ foam against the wall studs and then use OSB on top of that as the exterior of the building? Correct me if I am wrong but the OSB would still provide the sheer strength and the foam panel on the inside would allow for spray foam between the studs against the foam panels without having to worry about moisture issues or an additional vapor barrier.
The shear is actually derived from the combination of studs, nails & sheathing together – placing a layer in between defeats that. With that said there are some manufacturers that have an integrated board with foam on the inside that are supposed to meet the requirements but make sure you look at the testing specs to make sure it works in your situation. For more sheathing tricks – https://thehtrc.com/2013/common-sense-building-exterior-wall-sheathing & on WRB / vapor barrier https://thehtrc.com/2013/common-sense-weather-resistive-barrier