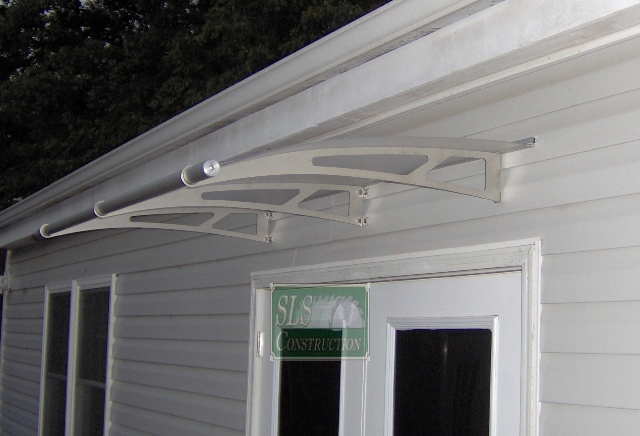
 While attending the Remodeling Show in Baltimore, I stumbled across an interesting product that could potenialy solve a problem I have had on the back burner for a while. This issue involved the house featured in the Looking Back series & the front French doors. Unfortunately, the doors were facing almost due west and because the homeowners like to shut the interior doors, the entryway was hotter than they liked. We looked into adding a pergola, and other shade structures, but nothing seemingly would meet the needs of the clients & look like it belonged.
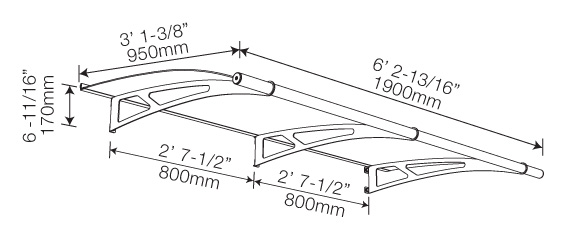 While strolling through the show floor, I came across the feeneyarchitectural PRODUCTS® Company & their LightLine® series of curved canopies. When I talked with the representative, not only was the price right, but they met and exceeded the ASTM E330 specs and the Dade County TAS 2020 & Dead Load tests.
Ordering & Delivery:
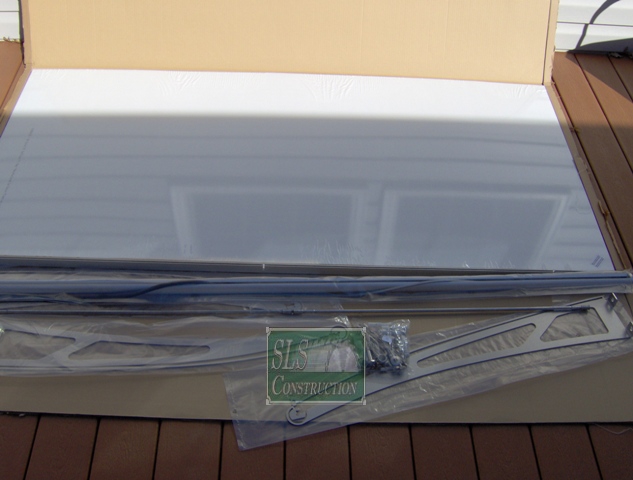 It looked like it would solve that one issue & the client agreed so we ordered the 1900 series with the frosted panel on a Friday. Fortunately, we just barely made the cutoff (they ship orders out on Friday’s) and it was shipped out via freight the same day. We received the product on Thursday via FedEx. The entire package is shipped on one large pallet & well protected.
The Warnings:
My my, these guys definitely make sure they cover their bases & they do make some very good points.
Please verify what type of wall you are dealing with before installing the canopy. If necessary, you may need to use screws and anchors other than those included in the enclosed installation kit. Consult a licensed contractor for installation hardware recommendations. Never attach canopies to vinyl siding, stucco, Dryvit®, or other synthetic or natural construction material walls where the structural integrity is uncertain or where possible penetration of a moisture barrier membrane mat create a potential for water leakage or damage may violate and void any product warranties.
Preparing for installation on vinyl siding:
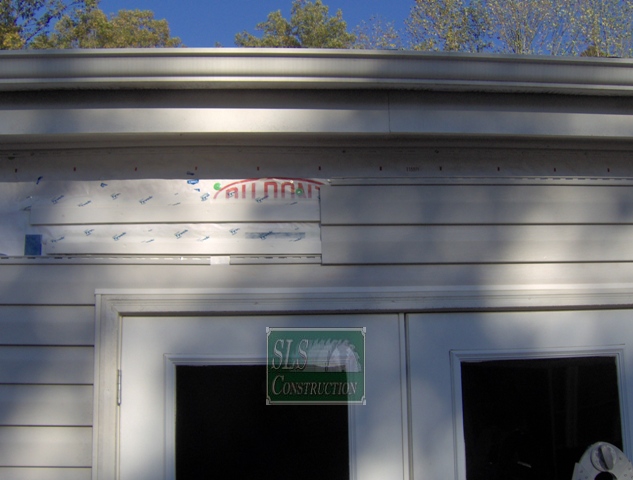
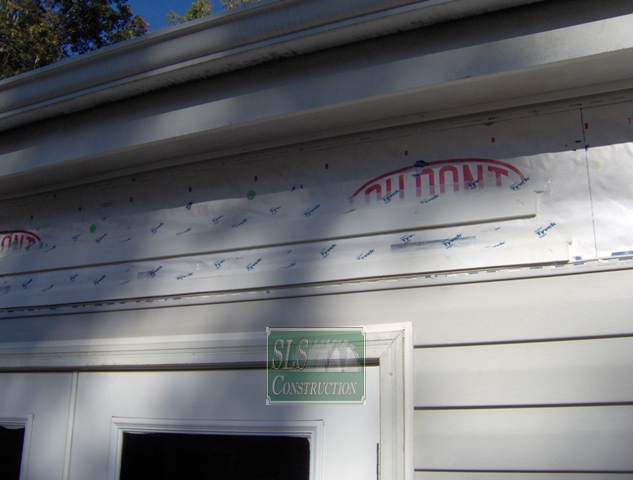 While their warning above lists vinyl siding directly, this did not concern me in this case. There are two main issues with vinyl siding; it cannot support anything and is easily crushed as it has no backing and then there is the issue with expansion & contraction. The first was easily fixed by adding in two strips of wood as show. Besides painting them, we adequately caulked them and flashed it to prevent any water intrusions. As for the expansion and contraction issues, that generally affects the length. Seeing the awning is located at the very end of two pieces of vinyl, it can still easily expand & contract on the other side of the panel.
Assembly:
 Ok, I do have two small complaints – the first is the screws for installing the L-shaped piece of metal – make sure you pre-drill the holes, as they are cheap & strip out really easily. The second is the directions – while it seems to be common knowledge that real contractors do not read directions, let me just tell you that is plain wrong. I scratched the panel as I missed the part about a gasket being added to the arms. Yes, you can see it on the directions, but it is not easy & I only spotted it after I scratched it. Oops, one more, you might want to fix the picture of the L shaped metal – it does not show the washers being required.
A few tips & tricks:
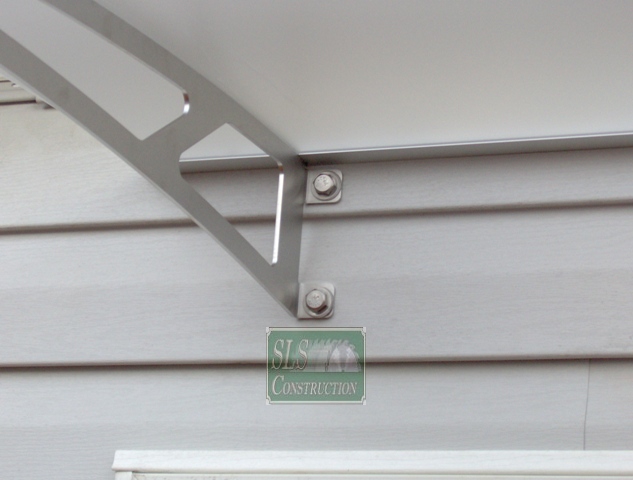 On the L-shaped metal, besides pre-drilling, you will need to ignore the directions when it comes to installing the gasket. Have you ever tried to feed a rubber gasket through a groove? Yeah, that’s not happening here. I found it easier to fold it slightly back on itself & pushing it in place as I slowly went down the entire length.
.
 “The “Click-Lock” system eliminates need to drill holes in acrylic panel, makes installation of panel into the stainless frame a “snap.”” Uh yeah, no it isn’t a snap – make sure you have a helper to help twist the gutter portion up & in while you lightly tap it with a non marring hard rubber “ball pein” style hammer till it snaps in place.
Finishing Up:
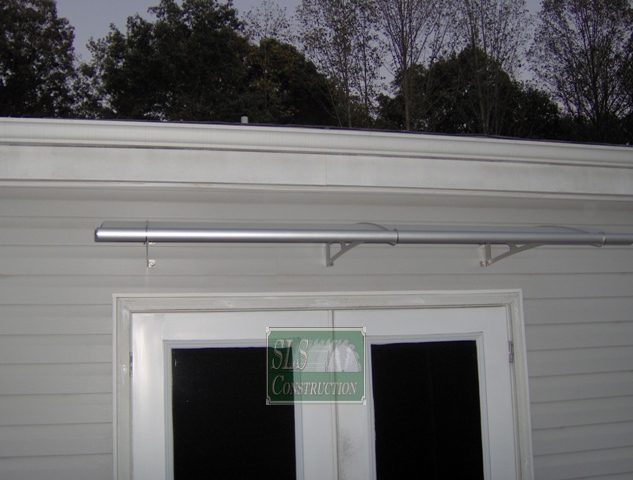 Once everything is finished, it is nice and solid. I would recommend that you actually wear those cheap gloves that they use in the doctor’s office to help prevent it from getting dirty. Now while they do include directions on how to clean it and suggest a product to do so, they don’t include any. Personally, I would like to see them enclose a small bottle with the system, but until then, I would recommend buying a bottle with the order, or making sure you have another suitable product available.
Costs & Time:
The retail prices are conveniently listed on their site ($753 to $2763) & the freight varies based on your location, size & weight. In our case, it was a little over $140 for delivery. As this was our first time installing one of these, it took two of us just under 4 hours each, which included cutting and painting the backer board. I think in the future (depending on what we are mounting it to) it could take anywhere from 4 to 8 man-hours total.
Final Thoughts:
Overall, it is a great system, that is very well designed and I have no doubts it can handle the occasional high winds. Unless you are installing the smaller “1500” series, I would definitely suggest having a helper. If the panels happened to be damaged, they can relatively be easily replaced. As for the “clear glass” option, I really do not see that being appropriate for most locations or purposes.

It’s a nice looking canopy. How does it drain rain water, though? I suppose on either side. Do you angle it slightly to keep run-off strictly on one-side?
Good morning & thanks John, I agree it is a pretty nice looking canopy (I think a slightly larger one might have been better, but that would have exceeded the budget)
To answer your questions – The front bar is actually a gutter which allows the water to run out the ends so no sloping is required
Where the L-Bar is against the house – there is a runner gasket which prevents the water from getting in behind it and the slope is already built in to make the water run all the way to the front
It’s a nice looking canopy. How does it drain rain water, though? I suppose on either side. Do you angle it slightly to keep run-off strictly on one-side?