 You know it is going to be an interesting day when class starts off with a brief project & objective which you know is impossible. The reason is to see if anyone will get the answer correct – sorry I am not going to even try as what you requested isn’t possible. Yes we all failed miserably but had some fun trying to get it.
Level 1 Recap:
After that fun little foray, we broke out the books & recovered some of the IR Level 1 basics;
- You can’t change the focus & range of a saved image
- Focus affects the temperature & it is vital for the details to be sharp
- Level is to Brightness as Span is to Contrast
- One cannot see through walls or what the true interior temperature of an object is
- No technology can find a problem or failure before it happens, only after it is already in the failure curve
- The field functionality test (FFT) utilizing another person standing 3’ away, emissivity at .98, background to ambient temperature – pull into proper focus & check the tear duct – if it is correct you should get a reading of 92-98°
- BTU’s, Calories, the laws of thermodynamics, and delta T’s
- The RAT aka Conservation of Energy Law (Reflection + Absorbed + Transmitted = 1)
You may see this again:
Each instructor has a different method of saying “hey, you should pay attention as you will probably be quizzed on this…” While he doesn’t use that term like the military does, you know when you should highlight an item or write down a “key” point. So here are a few of those key points…
FFT, for not only tests, but real life best practice:
So if you wish to get a 70% or above on the test as required, you need to remember to do a FFT before you start the practical & also once again after completing it. This is to help drill into our heads that we should do the same thing at least every day. But why? Well if you have an issue with the camera & you need to send it in for a calibration, it might be nice if you can minimize which data might have been affected.
Temperature Scale:
Oh boy, fortunately we get a sheet to remember these conversion scales, as I have so many equations required by all these different programs that I have gone through – I can’t hope to remember them all.
- To convert °F to °C = (°F – 32) ÷ 1.8
- To convert °C to °F = (°C X 1.8) + 32
- To convert °C to °K = °C + 273
- To convert °F to °R = °F + 460
5 items that affect emissivity:
- The material itself (Black hole box – near perfect emissivity 1, face .98, black electrical tape .95, copper .02 to .6, etc…)
- The surface (Rough, Polished, etc…)
- One’s angle of view (while you should not be looking directly at the item, you should be as straight onto it as possible – i.e. standing 5° off to the side)
- The temperature (while rare, the hotter metal gets, their emissivity can increase to the point of showing up in the visible spectrum)
- The wave length (Mid or Long – see FAQ’s for chart)
The picture, today’s trivia, and yesterday’s answer:
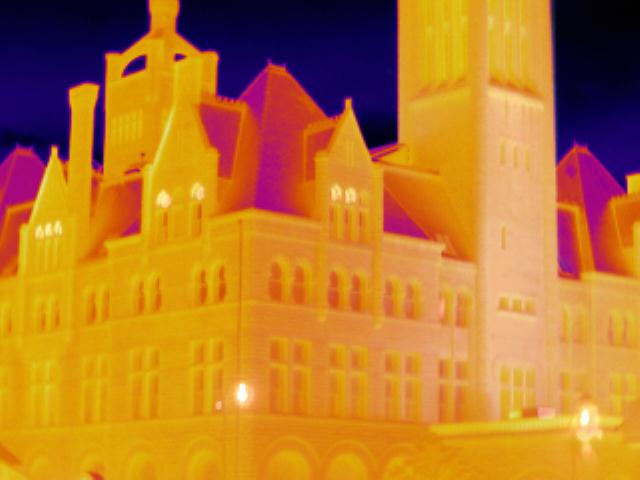
Well I managed to sneak a picture last night of Union Station & am wondering, how many hot spots do you count? To make it easier, the brighter white the color is – the hotter the area is… Be careful, not everything maybe as it seems…
Major props to John D. Poole of Birmingham Point Preservationists for basically nailing yesterday’s Trivia question (please see the comment section)


I count fifteen hotspots…nine of which I’m fairly certain of and attribute to lighting. The rest I’m less certain of.
(And thanks for the mention!)
My pleasure on the mention as you did good. Sorry, but as I warned not everything is at it seems – I popped the actual answer into Day 3’s post
I count fifteen hotspots…nine of which I’m fairly certain of and attribute to lighting. The rest I’m less certain of.
(And thanks for the mention!)
My pleasure on the mention as you did good. Sorry, but as I warned not everything is at it seems – I popped the actual answer into Day 3’s post