 For many the easiest way to describe HVAC / Forced Air system is to equate it to one’s own heart. With that in mind, the duct system in one’s house is comparable to the veins & arteries in your body. The supply ducts bring nicely conditioned air to all the parts of the house that need it just like arteries. The return side of the duct system performs just like the veins, bringing back what is required to be oxygenated or in this case conditioned. If you have an issue with either of these parts, the consequences are often noticeable like;
- Burnt out components / dead unit
- Rooms not getting enough conditioned air
- Doors slamming shut when the unit kicks on
- Sky high electric &/or gas bills
- The house is excessively dusty
- Whistling sounds
- The infamous frozen coil (come on it’s a 100+° outside, how can it be frozen?)
- And the list goes on…
While we would love to be able to hit all these symptoms in one article that simply isn’t feasible, so we are going to concentrate mainly on one issue: stopping the bleeding or leaks in this article. While we have covered the benefits of sealing the ducts in our FAQ article, one interesting item I saw recently was from the Arizona WAP program. In one of their presentations they explained why they focus so heavily on fixing the ducts. With an attic temp of 115° & a leakage rate of 15% one is looking at a 50% reduction in cooling capacity, which can be a pretty common occurrence in most of the US during the summer months. Now imagine what happens when you consider that the average unit is generally 20%+ leakage and couple that with attic temperatures reaching 140° – 160°. (For more on the Codes, Duct Testing Procedures, and pricing)
Homeowners: As an FYI, the bulk of this article is mainly focused on the professional HVAC contractor & some of their questions on what does it take to do the job right & to pass the test. With that said, the next three sections are mainly for your benefit & the rest of the information should be reviewed if you are going to try to DIY it.
WARNING: if you come across any ducts, pipes, etc… with a cardboard like substance wrapped around them – DO NOT touch them as that possibly contains asbestos. Call in a professional to get them tested & removed if needed. (If you are planning on having an energy audit done, air sealing work to be done, remodeling in that area, etc… removal is mandatory)
General Materials Needed:
- IMPORTANT NOTE: Duct Tape is not to be used on ducts – it should only be used on ducks, to make wallets with, prom dresses, etc… The tape used & mentioned below is a specialty tape with a UL listing on it for ducts (UL 181B-FX, UL 723, UL 181A-P).
- Tie Strap with tensioner (Love this saying – my 7 year old with a tensioner can do a better job than anyone not using one)
- Mastic & Fiberglass Mesh Tape (Thinner is not better, and neither is a globed on mess – just remember a smooth install that is as thick as a nickel will not only look more professional, last longer, but make finding any issues a breeze)
- Silicone
Home Made Duct Tester:
While neither of these will give you a number like we get, it can be a big assist:
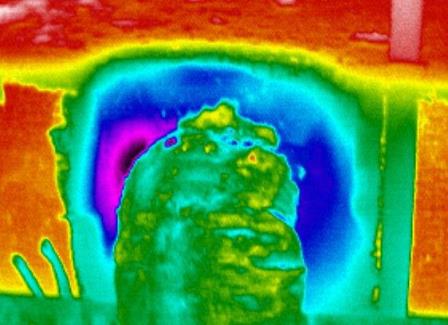
- If you are looking for leaks in your own home, the best item is to simply turn the fan on or test while the heater / AC is running (Not only did this show up easily on the Infrared, you could actually feel it)

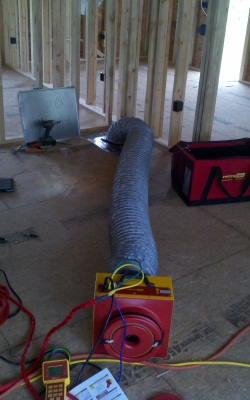
- For HVAC contractors – with the air handler removed, tape off all the registers / boots & use a commercial fan – this should give you more than enough pressure to detect any leaks on the supply side
Disconnected Ducts / Open Panels:
Believe it or not, we still run across these, even on new systems. In some cases the installer forgot to put a panel back on before the test, while in others lines were inadvertently knocked loose (not that this should happen but we will get to this later).
Flex Duct / Boot & Collar Connection:
By far & away, most HVAC contractors spend the most time worrying about this connection which rarely is an issue if they simply install it properly. I know of one that went so far as to silicone, mastic, connect, screw, double tie, tape & mastic the connection. Not only is this overkill, but there are two problematic area’s with it – the mastic between the collar & flex line & the screws.
First off the plastic liner should never be punctured as this eliminates the strength of the connection and the mastic acts as a lube. If you are a belt & suspenders type like me, just double up on the ties. A proper install is at minimum one tie installed with a tensioner. Then the outer liner is either sealed to the collar with mesh tape & mastic or another tensioner. Personally I don’t have an issue with duct tape, but some areas frown on this, so it is better to ask the Building Department first.
Linear seams on duct work:
While I hear many in the industry say that the snap lock seams are tight & there should be no issues I have seen to many damaged seams from trying to assemble the in close spaces or finagle them in place. A quick seal using tape & a squeegee only takes a few seconds & beats having to rip the insulation off looking for an air leak later which is preventing you from passing.
Panned Joist Returns:
Nothing spells trouble faster than trying to re-use some old ducts or the panned joist returns (Return or supply using framing spaces as duct work) If you are installing a new system, you will save more money & time by running all new. For homeowners, or where that might not be an option, you have your work cut out for you, especially if they used 1x or 2x’s for the subflooring. First you need to thoroughly vacuum these spaces out & put the tape away. For big gaps you are looking at backing rod or sprayed in foam followed up with mastic & fiberglass tape.
Metal Elbows & Butt Joints:
Generally this is not an issue for many as they simply run flex lines for almost everything. For those running metal ducts they generally are pretty good at making sure everything is well sealed with mastic. The main issues we see are by those that use tape to try sealing those seams and connections (especially on elbows). Due to the nature of metal expanding & contracting – mastic is the best option in these cases. Please remember that mastic &/or tape is not a connector – metal to metal fittings need to be screwed together unless it is a snap-lock fitting.
Take-off Fittings:
With so many variations out there (including some with rubber gaskets) trying to do a one size fits all is difficult. In short, simply make sure that when you install any fittings that both the inner & outer parts are sealed as recommended by the manufacturer. For homeowners, I would not recommend trying to fix the interior if leakage occurs and instead focus on the exterior with screws (if not installed), mastic & mesh.
The Boot & Register:
If the boot is not sealed to the drywall or subfloor, you are almost guaranteed a failure. While the allowable duct leakage number is higher for a finished inspection, which is to allow for air escaping through the finished flooring. If the air can easily flow back into the walls or flooring cavities then you are going to have some issues. By simply correcting this issue in my own place I knocked my leakage figure down 15% from where I started.
Plenums:
By a far & wide margin, this is generally the biggest trouble spot for most, especially the area where they connect to the HVAC unit. While one can easily seal the outside edges in 3 areas, it is that fourth side that is underneath or against the wall which causes the headaches. This area is also where the greatest pressures are exerted in the system so a tiny leak can result in more leakage than if it was at the end of a run.
Refrigerant Lines and Other Misc. Openings:
Make sure you seal around these properly as the dust test does include the air handler and the manufacturer does list this in there steps. Access panels, should be sealed up per the manufacturer’s directions with the appropriate gaskets provided.

Great article. I am going to have to go back and review all of your air sealing series and may share it with some of our local insulation contractors.
Thanks Josh & please feel free – along the same lines, if you ever have something to add, please let me know as I know you deal with these issues daily in your job.
It’s hard to come by knowledgeable people in this particular topic, however, you seem like you know what you’re talking about! Thanks