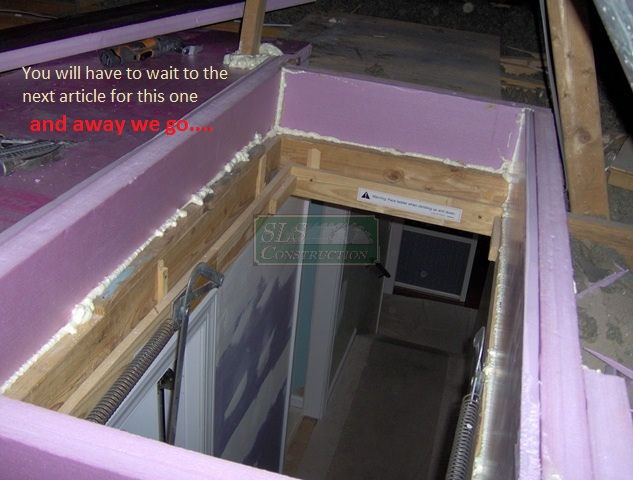
 In the last article we did in our Air Sealing series, we were dealing with an issue many people with regular attics have – namely an un-insulated attic hatch. In this article we are going to deal with two other problems many homeowners have; and that is a way to store items, while allowing for the proper amount of insulation to be in place, along with a way to get to other areas without disturbing said insulation or putting a hole in the ceiling below. While the problems may seem to be miles apart, the solution will work for both of them. Just like the attic hatch, the goal is to make a highly effective structure that will last, not cost a fortune & is easily assembled.
Sorry, but I have to ask, now while the codes allow for ductwork, water lines, equipment (air handlers, water heaters, furnaces, etc…) to be placed in those types of attics, and many people also love to store stuff there – are you freakin nuts? I mean it’s not like those attics ever get below freezing, or during the summer reach temperatures in the 140’s, right? Ok, rant over; let’s get to building as not everyone can go with a hot roof system.
The Survey:
Before you go rush off to the store you need to:
- Decide where you would like the walkway or storage areas to be & how large are those areas, remember this system is designed to span multiple trusses, not fit in-between them
- Pullback & move any insulation in these area’s (safety first- at least wear a respirator & gloves)
- We are assuming Batt insulation, cellulose, or a wool style – if it is vermiculite, you need a professional to remove it
- If the insulation is still in good shape it can be reused — if not you might consider hiring a professional to remove it all & spray in cellulose after you have completed this project
- Check for gaps, holes, and other items that may require air sealing work to happen before you cover over it
- Check for obstructions
- Electrical
- If the wires in this area, are knob & tube, aluminum, or the older style cloth wrapped type, you need to stop & get an electrician
- If the wires are regular Romex type & run over the top of the trusses, we have a fix for that below but you need to measure how high they stick up
- Junction boxes, fans, outlets, etc… you may not cover these up
- Bracing or other support posts – if you only have an area 16” wide to put a walk way, that needs to be noted and the plans adjusted
- Plumbing – vent stacks can be cut around, a pipe going across the area may require you to consult a professional, or not place anything in that area
- Flue Lines & Chimneys – quite simply, don’t go anywhere near them & make sure you consult or hire a professional about any work done near them.
- Electrical
- Attic hatch or access – how large is it – can you get a 24” by 8’ panel into the attic area – does it need to be narrower, or shorter?
- Measure the space & draw it out so you only need to make 1trip to the store
Materials needed:
- 2” thick foam-board (4×8 sheet) with an R-Value of 10 or greater
- ¾” OSB or Plywood ripped in half lengthwise (this gives you enough for 2 sections – most stores will do this for free or for a minimal charge)
- 1 2’x2’ sheet of drywall (if electrical wires are in the area – 1 sheet is generally enough for 3 sections)
- 1 can Great Stuff® foam or similar (depends on area’s that need to be sealed & how many sections but up against each other)
- 1 tube Liquid Nail® or other construction adhesive per section (if you don’t use it all, you can always return any full tubes later) ** make sure you read the label to make sure it is compatible with foam – the version we did use is compatible, but it should not be used when the temperature is greater than 90°
- 2” or larger screws
Final Prep:
Once you have your materials list & checked it twice, it is time to go pick the materials up. One trick that I occasionally use is to have the lumberyard rip the wood into the appropriate size for you. Many lumberyards will do that for free or for a nominal charge. Once you have all the materials you will need, it is time to seal up all those cracks, holes, etc… In many cases (like ours), you will have to deal with some wires running over the trusses. We simply cut some scrap drywall in 2” wide strips to fit around them, placed a bead of construction adhesive where they were going & screwed the scraps into place.
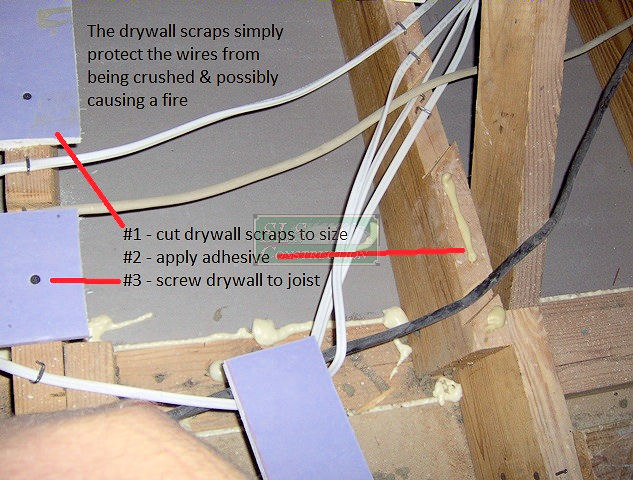
QUICK TIP: we will be installing a few crews later, so if you can’t remember where they are (rather be safe than sorry) on each joist write down where the no crew zone is. Place a mark 1” outside of the area where the board will be and measure from that to the wire(s) – add 1” to both sides & write that on each joist.
Insulation – now or later?
If you are going to be installing a blown in product later (with a blower), you may ignore this section & move on. If not, this is the time to install the insulation. If you have a loose fill product you will need to re-rake it back into place – it needs to come up to the top level of the drywall with a slight mound in the center of each bay. If you are installing an un-faced Batt style insulation, it should be installed per the manufacturer’s directions – fluffy, not compressed, completely filling the bay, etc…
Final Steps:
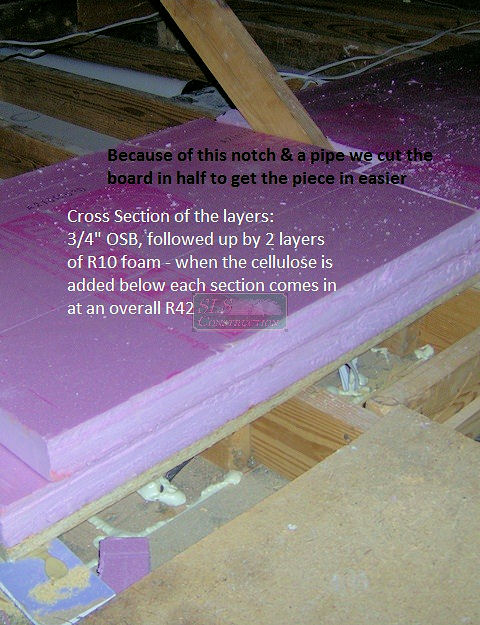
The first item to be installed is the ¾” Plywood or OSB – we also set this in a bead of Construction Adhesive & installed at least 4 screws per section. As the board is ¾ of an inch thick & the drywall adds at least ½ an inch of thickness, you will need to use a 2” screw or larger to adequately anchor it to the joists. We then simply added in two layers of foam board on top of the OSB in a bead of construction adhesive & placed some weight on it while the glue dried. While we didn’t install the cellulose until a week later, you should be able to install it within 15 minutes if that is what you are doing.
Obstructions & Adding Sections:
As you can see we had a few obstructions to overcome, which we were able to simply notch the wood & foam around. Quick Tip – for notching foam, you can put the knife away & just use a handsaw, drywall saw or hacksaw blade to make the cuts easier. We did not concern ourselves with patching the wood, but we did patch the foam areas up with scrap pieces. To complete this process and eliminate any leakage we sprayed the foam in any remaining gaps or holes.
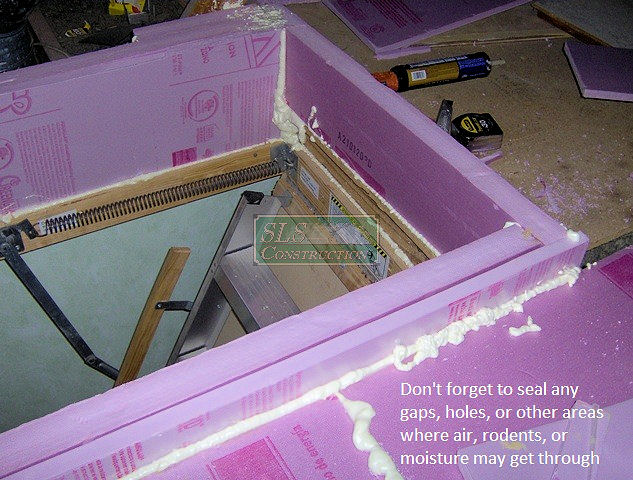
While we only did one section, you can see how easy it is to put more in the attic. If you have two sections next to each other, we recommend you wait at least 15 minutes for the glue to set, before foaming the two sections where they meet. Note: while some people prefer using tape on the seams, I have seen it come off in high heat situations & prefer to simply use foam to seal up the small crack.
The Verdict:
On the R-Value front, each section comes in at an R42 (2×6 cavity with a 1/2drywall spacer filled with cellulose) 12 points higher than what is required in our climate zone (2×4 joists = R35). For those zones further up north, another quick layer of foam would easily get them to the minimum required R49.
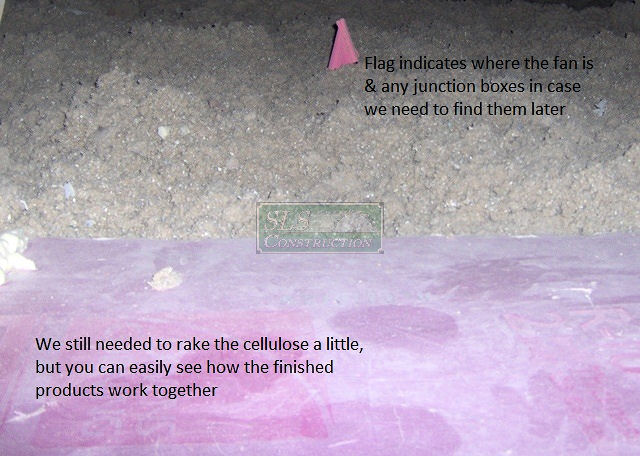
The foam is also quite easy to walk on and can easily handle items being stored on it. Speaking of storage, please remember that unless an attic was designed for storage, the codes only dictate that it can handle 22# of weight per foot – so overloading it can cause some issues. While the glue & screws will help strengthen the system and the foam is lightweight, you still need to exercise some caution.
Applicable Codes:
2009 IRC N1102.2.3 & 2009 IECC 402.2.3 …Access shall be provided to all equipment which prevents damaging or compressing the insulation.
2009 M1305.1.3 Appliances in attics: …The passageway shall have continuous solid flooring in accordance with Chapter 5 not less than 24” wide. A level service space at least 30” deep and 30” wide shall be present along all sides of the appliance where access is required…
(WARNING: check with your local building officials as this system with the foam may not be approved by them without changes due to fire concerns caused by the equipment being located in the attic)
2009 E3802.2.1 (Cables in accessible attics) Across structural members: Where run across the top of floor joists, or run within 7 feet (2134 mm) of floor or floor joists across the face of rafters or studding, in attics and roof spaces that are provided with access, the cable shall be protected by substantial guard strips that are at least as high as the cable.
