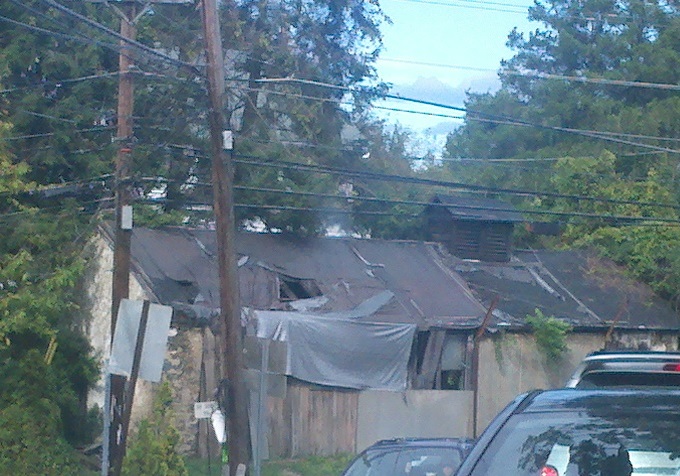
 When ones roof is damaged it is only natural to want to stop any water from getting inside, which also happens to be one of your insurance company’s primary concerns. While it may take weeks or even months to get a roofer out to repair the damage, a tarp can be put in place pretty quickly. A properly installed tarp can not only help prevent any further water intrusion which reduces the insurance companies cost, but can help you get your life back to normal faster.
- If you have a ladder, a knife, a cordless drill, & saw you are all set & just need to pick up some supplies
- A Tarp that will at least extend past the damaged area by at least 3’ on each side, the bottom & the ridge
- The thicker the tarp is the better
- If it has UV inhibitars, that will also help if the repair takes longer than planned
- If you have access to the Blue Tarps FEMA uses, grab them as those things are built to last
- 1×3’s or 1×4’s – it doesn’t matter if they are pressure treated or not (enough for the perimeter of the tarp purchased above + 4’)
- 1# of 2” or longer deck screws & the associated bit (If the tarp is larger than 10 x 20 or you buy 3” screws you may wish to buy another box to be safe)
- Drywall screws & the galvanized knock off versions are not wise choices here
- If you don’t have a cordless drill &/or rather use nails, they should be galvanized ring shanks
- I also like grabbing some galvanized washers which helps increase hold down power & prevents over-driving
- A sheet or partial sheet of 3/8 plywood to cover any punctured areas
- Got any vent pipes in the area, pick up another vent cover that can slide over the existing one &/or some hurricane tape
 Safety First: don’t forget to use you ladder safely & use fall protection. These tarps can be very slippery even when dry & there is no sense turning one emergency into two.
 - A Tarp that will at least extend past the damaged area by at least 3’ on each side, the bottom & the ridge
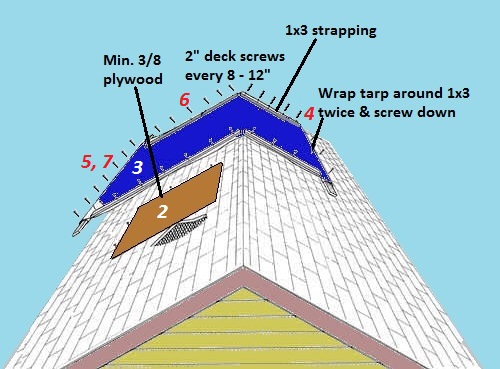
- If required — Cut plywood as needed & cover up any existing penetrations with plywood – secure the perimeter with screws every 6” to 12” into the roof sheathing below (preferably into trusses)
- Unroll the full tarp & make sure that the length extends 1’ past the edge of the roof on the damaged side. To make sure it doesn’t blow away in a light breeze you can use your tools, boxes of screws, strapping, etc…
- On the undamaged side wrap one end of the tarp around the 1×3 furring strip – making sure the furring strip extends past each end by 1’. Temporarily screw the rolled end down to the roof with at least two or three screws. (If you have a vent pipe in the way skip to step 5)
- Repeat this step on the damaged side by wrapping the tarp around another 1×3 twice & pulling it tight.
- Got a vent pipe in the way, carefully cut out the opening for it & make watertight with some hurricane tape &/or vent cover before pulling it tight
- I generally prefer to attach this to the fascia or the very edge of the roof. This can be one of the trickiest areas as the tarps themselves can be very slippery so I will generally do this from a ladder
- Screw the roll side down either at the edge of the roof or to the fascia with a few screws
- Pulling the tarp tight around the edges apply 1×3 strapping with deck screws every 8” to 12” making sure you have one within 2” to 3” of each edge. Don’t forget to secure the strapping used in step 4.
- Time to make sure everything is off the roof & secure the final strapping used in step 5 every 8” to 12”
 Your insurance company & policy requires you to help prevent & minimize any more damage to the property as quickly & safely as possible. This does not mean that someone who is uncomfortable being on a roof must go up there & do it. If this is not something you feel comfortable doing you may bring in a professional. If this is something you can safely handle, make sure you keep track of all materials used along with the time spent as you should be reimbursed for this. Your insurance company & policy requires you to help prevent & minimize any more damage to the property as quickly & safely as possible. This does not mean that someone who is uncomfortable being on a roof must go up there & do it. If this is not something you feel comfortable doing you may bring in a professional. If this is something you can safely handle, make sure you keep track of all materials used along with the time spent as you should be reimbursed for this. |
Congratulations you now should have a temporary patch that should withstand most wind & rainstorms. Depending on the quality of tarp used the patch should easily last anywhere from 1 to 6 months.

Thanks for the info. I’ve been looking for a vancouver commercial roofing company for a while
Thanks for the info. I’ve been looking for a vancouver commercial roofing company for a while
Thanks for the info. I’ve been looking for a vancouver commercial roofing company for a while
Really very interesting post thanks for share……….
Really very interesting post thanks for share……….
Really very interesting post thanks for share……….
I’m guessing that a pipe boot or a ‘No-Calk Plastic Drip Edge Flashing’ from homedepot would work.. I was going to use a large sheet of flat metal, align it with this product, drill holes all around w regards to rivet size, then place the large sheet metal with with rivet nails and exterior chalk beneath the pipe and place the tarp above over it and place boot over it and use a lot more exterior clalk and rivet the pipe boot so there is a right water proof fit around the pipe ..
but I found out ti’s just a leak around the window so tarping the entire roof might be foor not .. ha ha
You have a great insight about the topic. We recently moved into a house that we know needs some repairs so we can sell it after it’s fixed up. The roof probably needs to be replaced, so we’ll have to ask whether it has enough ventilation to keep it in good condition before we put another one in.