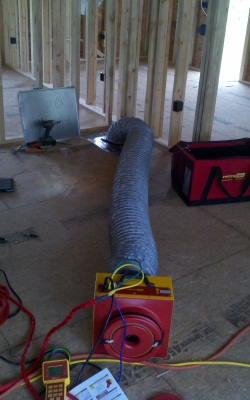
 Quick Note: As many know “The HTRC” was created and brought to you by SLS Construction & Building Solutions LLC. Many of the articles on here are based on projects we work on, questions that are asked, etc… In this case, this piece was brought about by a few recent tests we did & basically covers not only why we choose to do things a certain way, but how the process works.
One of the worst things when coming out to do a duct leakage test, is telling someone whom you know spent hours sealing the duct work – sorry, but it isn’t enough. We had such a case last week & sadly we were the second company to do it. Why were we called? Well because when the first one came in, they setup their equipment & 20 minutes later simply handed them the results that said you failed – 81 CFM.
“Well where are the leaks” said the builder
“We don’t know… we do offer aero-sealing work which will seal the ducts for you” said the tester
Needless to say the builder did some research and spent a few hours redoing mastic & taping after cutting all the insulation off the ducts. The catch they needed to be at 48 CFM & their initial results after doing this were worse than what was originally tested. So how did this happen & more importantly, how did they pass?
Initial Checks & Issues:
The first thing that we do is double check that we have the right selections made on the manometer. The next is that we didn’t miss taping a supply or return and that the tape is holding. In this case all was well and we found out that the initial tester, ran the test using the humidifier opening (wrong place & they failed to remove the filter). With that we also noticed that we needed to seal around it better, but alas the numbers were still higher than originally tested.
So what causes that – well remember how we mentioned above that they cut the insulation away to seal? Well they had done a great job insulating which helped keep the leaks from leaking out as much. (Remember we only pressurize the system to 25 PA) The insulation used though wont keep the air in as much as was required. By opening it up, all the leakage was allowed to escape & while some leaks were sealed, not all of them were.
Why we do it our way:
One item that throws many for a loop is that we allow for a full hour per test (approx. 20 minutes for setup – 40 minutes for the test) while many simply test & scoot. Even if they pass, we give them the opportunity to leave the equipment running & to seal it up further. Why do this? In many cases, it is a great learning opportunity for the contractors – we do this, X happens / these are the areas we need to make sure we take care of. Well here is some of the highs & lows…
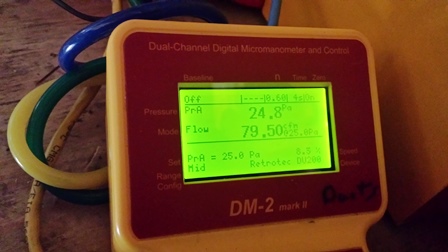
0940: After the contractor had spent some time feeling around duct boots & elbows – resealing as needed this is where we stood
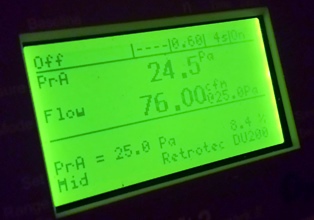 0955: Granted 3 CFM doesn’t equate to much (unless that is how much you are missing the “pass” rating by), but it does show that one needs to seal all seams, including the lengthwise ones. They had somewhat already done this by applying mastic to the groove & then closing them together but it didn’t seal them completely. One trick many commercial contractors do is to assemble the duct pieces separately & apply mastic to the longitudal seams and then allow them to dry overnight.
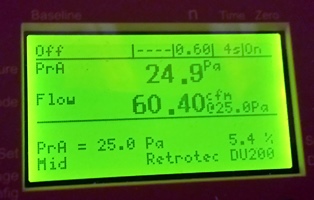 1005: Ahh now we are seeing some better results. The reason, we bumped the air flow up making it easier to feel the leaks & they were found on the return side of the air-handler. Amazing how many don’t adequately tape under the unit…
Needless to say at this point we were past the one hour mark but if we can fit in the schedule, we also allow for additional time in case they don’t pass to keep the equipment running to hopefully get them to a pass. Granted we do charge for this additional time if they need it, but it is cheaper for them to have us stay there a little while longer than to have us simply come back for a retest.
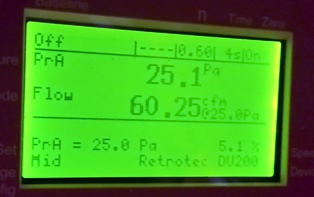 Ouch – 15 minutes later, not much of a change. Why the contractor was back to checking duct boots & elbows. Hmm how about the supply side of the air handler…
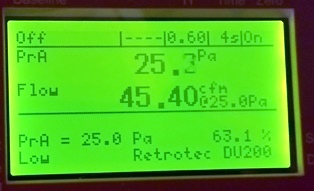 1040: Bingo & that is a pass
Why not use smoke?
Many of seen videos of smoke testing & wonder why we don’t use smoke aka why do we rely on turning the pressure up & feeling for the leaks. The first is we don’t have that piece of equipment & even if we did the only time I could see using it is when one is doing a demonstration outside. The one thing to remember is that the smoke used does leave a residue, so using it in a finished house is not a good option. Also as many of the units are in confined spaces, the smoke would rapidly fill the area leaving one trying to figure out where it is coming from. The other issue as pointed out above is air seeks the path of least resistance so while an area may seem fine at first, it could still be leaky.
Some quick lessons:
- Remember this is a percentage based test – in this case 4% of conditioned floor area, so a 1 or 3 CFM here or there starts adding up
- Mastic is a great product when installed properly – it not only has to be thick enough, but also smoothed out to make sure everything is adequately covered.
- Don’t forget to use the gaskets included with the air handler & seal up seams on all connections to it
- Don’t forget to add water to the condensate drain line trap (3 to 5 cfm)
- Some air handlers are better than others – some you may have to seal the seams inside (with that said, it is generally worth doing anyways)
- If given a chance – try to test without insulation being applied at rough in (or better yet keep all the ducts & unit in conditioned space). Ahh but I am using round metal duct & covering with a flex type of insulation. Well in this case, make sure you have enough to cover the full length of the duct but leave it bunched up and straighten it out after the test

Good stuff! Needs a final edit.
Many thanks Ted & agreed – hopefully the updates help tie it together better.