 Don’t you just love engineers & others that use terms like fully aligned air barriers, or in code speak require that insulation be in “substantial contact and continuous alignment with building envelope air barrier…”? I think the term many are thinking of is, clearer than mud. This is one reason why we end up with items like the “Architectural nightmare” we wrote about along with a host of other issues. As most “green” programs either directly use or base their programs off ENERGY STAR® specifications (and even the recent codes are moving towards), I would say that is a pretty good place to start.
 ENERGY STAR has a slightly different take on what constitutes an air barrier & has some very specific language; An air barrier is defined as any durable solid material that blocks air flow between conditioned space and unconditioned space, including necessary sealing to block excessive air flow at edges and seams and adequate support to resist positive and negative pressures without displacement or damage. ENERGY STAR has a slightly different take on what constitutes an air barrier & has some very specific language; An air barrier is defined as any durable solid material that blocks air flow between conditioned space and unconditioned space, including necessary sealing to block excessive air flow at edges and seams and adequate support to resist positive and negative pressures without displacement or damage.
|
A few quick reminders:
- Read the manufacturer’s directions – gaps are needed between sheets of OSB & Plywood, most House Wraps should be cap nailed, not stapled…
- Make sure you know how different materials react (expansion / contraction) & act accordingly
- Use caulk &/or approved tapes to seal all seams & edges
- Use caulk &/or spray foam to seal gaps around wiring, piping, electrical boxes, etc…
- Rigid foam, plywood, etc… makes a great air blocking material for sealing up chases & other large gaps
- Use sheet metal and fire-rated caulk to air seal around flue
- You cannot use fiberglass or other air-permeable materials as a sealant (aka no stuffing fiberglass around window openings)
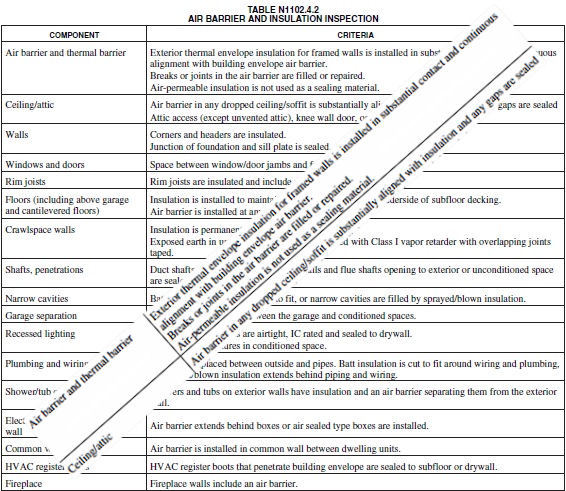
- This is not a full list of areas to seal, only some of the most common issues. You also should carefully review table 1102.4.2 (aka 402.4.2 in the IECC) as it has a few items specifically listed elsewhere

The Thermal Enclosure Checklist:
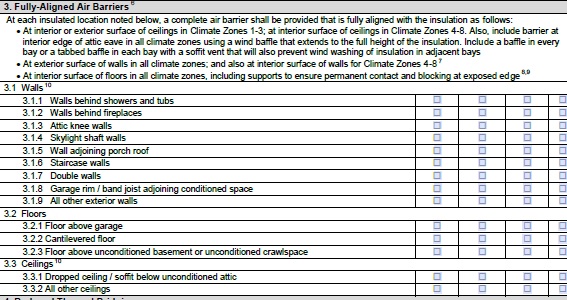
In order to qualify as an ENERGY STAR home, there are certain minimum specifications & standards that must be met. One of the ways to make sure this is accomplished is through the use of checklists. The one that address this area is called the Thermal Enclosure Checklist. Below is an image of Section 3 which is aptly entitled; Fully Aligned Air Barrier.

With that we are going to assume you know how to install “Tyvek,” sheathing, and other products properly & instead concentrate on some simple mistakes &/or other options to consider.
Walls Behind Showers & Tubs:
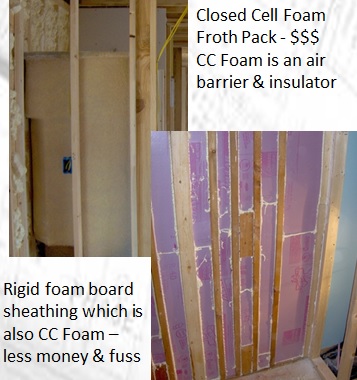
 Even if you live in CZ 1-3 (that does not require an air-barrier inside the home), this item is required by code (amen no more cold bath tubs). As they say there are numerous ways to skin a cat. On the left are two options if you wish to bypass the traditional batt & board system detail. These can also be used if calling in your foam guy seems out of the question, though I got to say with all the rim joists & other areas that can be sprayed early being open & available… 2 trips might work out best for both parties.
Another easy option though is one that your framers can do (if you are using a blown in product like cellulose), is to simply apply a 3’strip of Housewrap on the inside where the tub should be. (For shower surrounds – a 6 – 7’ tall piece) The only catch is that they should apply caulk to the faces of the studs/plates and use a lot of cap nails due to the nature of spraying in the material. I would also recommend that they run the material long; e.g. either go one bay past on each side or wrap the last stud.
Walls behind Fireplaces:
This one isn’t really too difficult as you take care of the exterior like normal & then insulate the exterior walls (yeah not the inside walls, the exterior.) Now you need to apply an air barrier inside that area which hands down should be drywall that is at least fire taped (aka Level 1 finish). All other seams, gaps & penetrations need to be caulked or foamed with a product designed for the heat.
Attic Knee Walls:
If you have knee walls, you really should consider a hot-roof system. If not let me just say that while Tyvek can be used, it is the last type of product you want to use, especially in the southern climate zones where they only require R13 in the walls. Just remember all the heat that those walls are exposed to during the summer & what wind blowing against a hotter surface does during the winter months.
Granted this is all about air barriers, but by choosing one that will help eliminate or minimize those issues makes for a good call. Go with a solid material – preferably a foam board that will help insulate those areas even more.
Skylight Shaft Walls:
Just like the knee walls above these areas can let in a lot of heat, but they can also cool down faster &or more than they should leading to condensation issues. Foam or a Roxul type board would be a good choice in these areas (especially if someone over frames it).
Wall adjoining Porch Roof:
Your air barrier should really go up before the porch is ever built. Along those lines you need to be careful that they don’t tear it off like they will be very apt to do. The flip side to this is even if they do leave it up, or you are counting on the sheathing – the porch area is just like an attic & extremely hot, so utilizing foam board against the exterior wall or even radiant sheathing for the roof decking would be worth considering.
Stair Case Walls:
Generally I don’t see an issue with someone forgetting to insulate / seal the lower exterior sections, it is where the stairs go from a unfinished basement or other such area that they forget to insulate that area. In some cases you will need to either insulate the walls all the way down or treat it like a cathedral ceiling.
Double Walls:
Welcome to the architectural nightmare article… If you don’t care to solve the issue as we mentioned you can always fill the entire cavity with cellulose, or spray it all with foam (5.5. open or 1.5 closed – making sure you have enough to reach R13 or what is required by code)
Garage Rim/Band Joist:
While drywall can be considered an air barrier, you still need to install one between the joists if they run into house area. The issue is carbon monoxide & other fumes getting past the drywall. The easiest way is to use a rim-board and keep the two areas completely separated. If not using sprayed in foam or foam board is a quick & easy way to do this. For boarding it up, simply cut some foam board to fit in the opening & either caulk around all the edges or spray it with foam all the way around it.
Floors above a Garage:
4 words: Closed Cell Foam ONLY – especially if you are going with a “the house needs to breathe” or exhaust only ventilation strategy
Cantilevered Floors:
Out of sight, out of mind? The best method here involves foam board also & a slightly larger rim joist. Install foam board between the joists (towards the inside as much as possible) – foam or caulk the edges. Add in your fiberglass batts, cap with a layer of foam board & then plywood
Floors:
The best route to take, is to go with a sealed crawl or insulated & semi conditioned basement (repeat after me ICF foundations are good). Beyond that make sure you seal all penetrations, around the ducts, seams & band joist area. Insulation must be firmly in contact with the floor sheathing unless you use rigid board under all the joists (be careful as this is not allowed per the codes yet – coming soon to 2105 code book though)
Dropped Ceiling / Soffit Area:
Do you want to make your life he11? Then by all means frame up your soffits, tray ceilings, etc… before drywall goes up… Why well because you now technically have 2 exterior walls & ceilings areas to deal with. Ok so how can one handle this so that you don’t have to bring back in your framers & delay the drywall crew? Well the easiest way is to have your framer handle it. Once the house is dried in and the interior walls are framed up, have them install drywall where these areas are.
- For a dropped hallway being used for the ducts; install the cap piece, side pieces down to the bottom where the framing ends, tape / seal the joints & frame it out (I know I shouldn’t have to say this, but you might want to let the HVAC guy run his ducts & seal them before fully framing it out)
- For a tray ceiling have them install the drywall cap (up to the far edge of the framing) & the exterior wall (bottom edge of the framing) tape / seal the joints & frame it
- Now you have the tricky area’s air sealed & the drywall crew can come in and knock out the visible sections with ease
All other ceilings:
No matter what the slope or type if insulation is above the ceiling, the ceiling must be air sealed which we have covered in depth. This includes not only around fixtures & penetrations in the ceiling but also at the top plates. Another overlooked part is besides the dreaded attic access is that you need to install air baffles to ensure that the insulation stays in place (aka in contact) with the air barrier which includes the exterior wall, top plates to the drywall.
